

Background
Zoidii ships with 3 user states:- Active user - anyone who logs into Zoidii to process work orders, make changes to lists etc. This user state requires an active user license. For example, technicians, mechanics, maintenance schedulers, and purchasing folks.
- Inactive user - a user listed in the system but cannot access the system. They do not need a user license. Inactive users will appear on user lists and can be assigned work, tagged in work orders, or sent notifications. This type is ideal for folks who don't need access but want to be kept in the loop. For example, add a vendor as an inactive user so they can get email notifications when they get assigned work.
- Deleted user - an inactive user that cannot access the system, cannot be assigned work, or receive emails. Toggle former employees to deleted when they leave the company.
Roles
Zoidii ships with 4 user roles:- Admin - Access to 100% of the features and functions in Zoidii
- Site Manager - Available when multi-site is enabled for the CMMS. Has access to certain features at their site.
- Technician - Has access to limited functionality that enables the operation of the system.
- Guest - the guest is an inactive user. They never log into the system, but may create and view their guest work requests
Procedure
1. In the top navigation bar, click the Settings icon, and select Users from the menu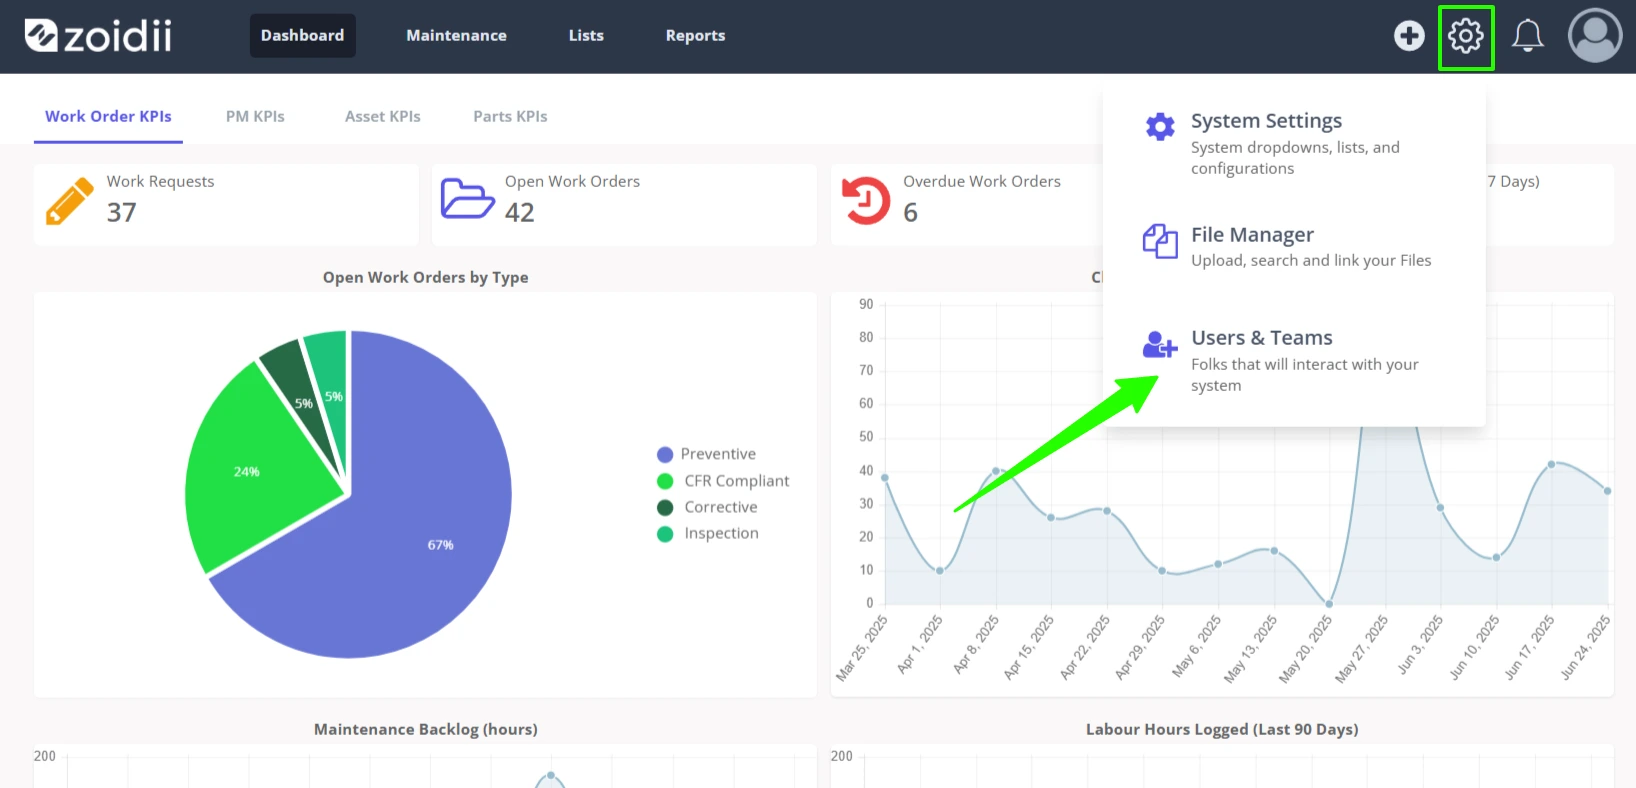
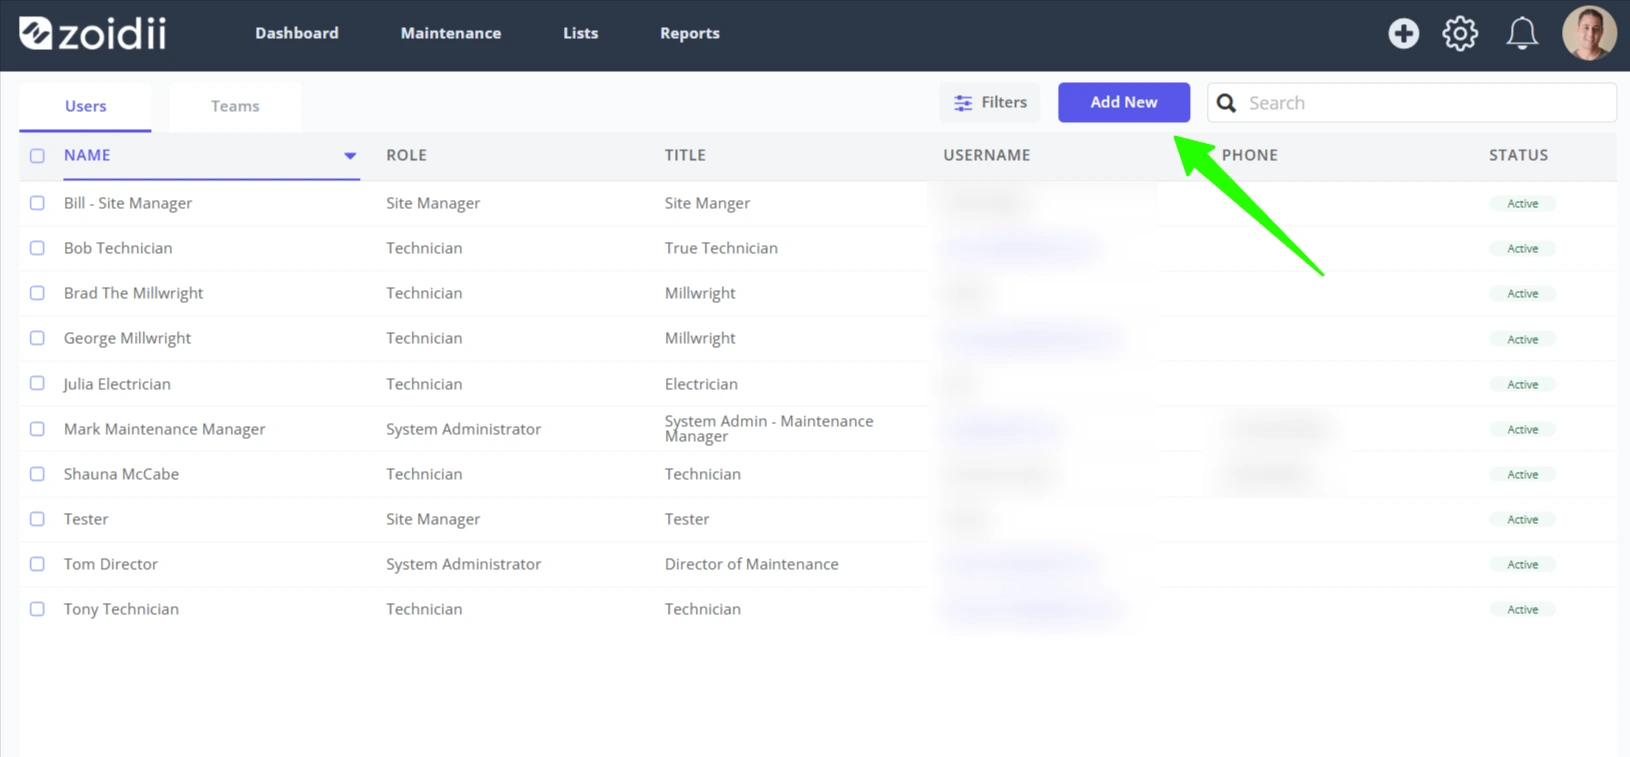
2. In the Users list screen, click Add New
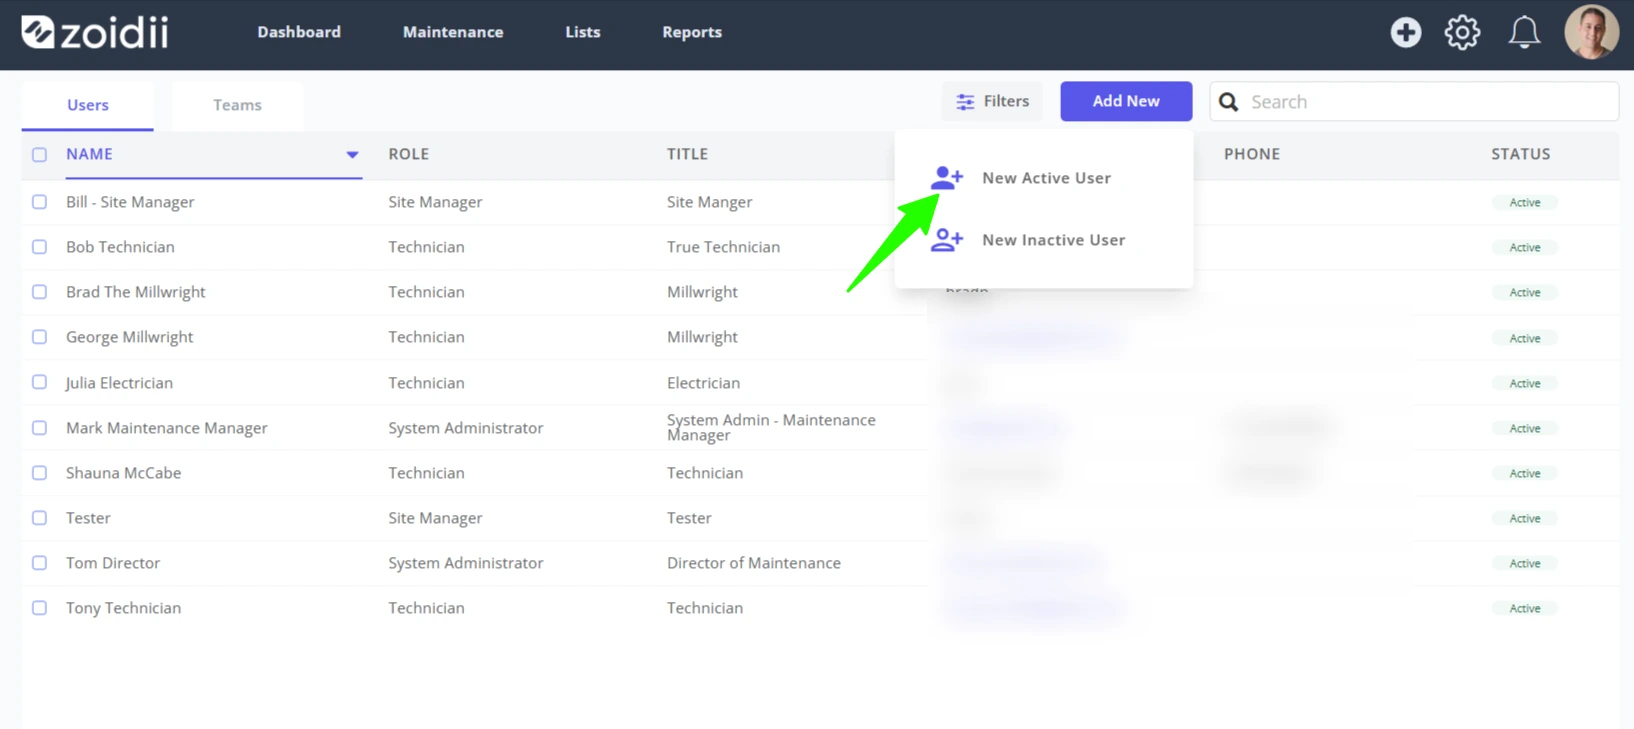
3. Click to add a New Active User to give the new user access to the CMMS. Choose New Inactive User if you don't want them to access the CMMS but get email notifications when added to work orders.
4. Fill in the name and title details for the user. Choose the appropriate role for the user:
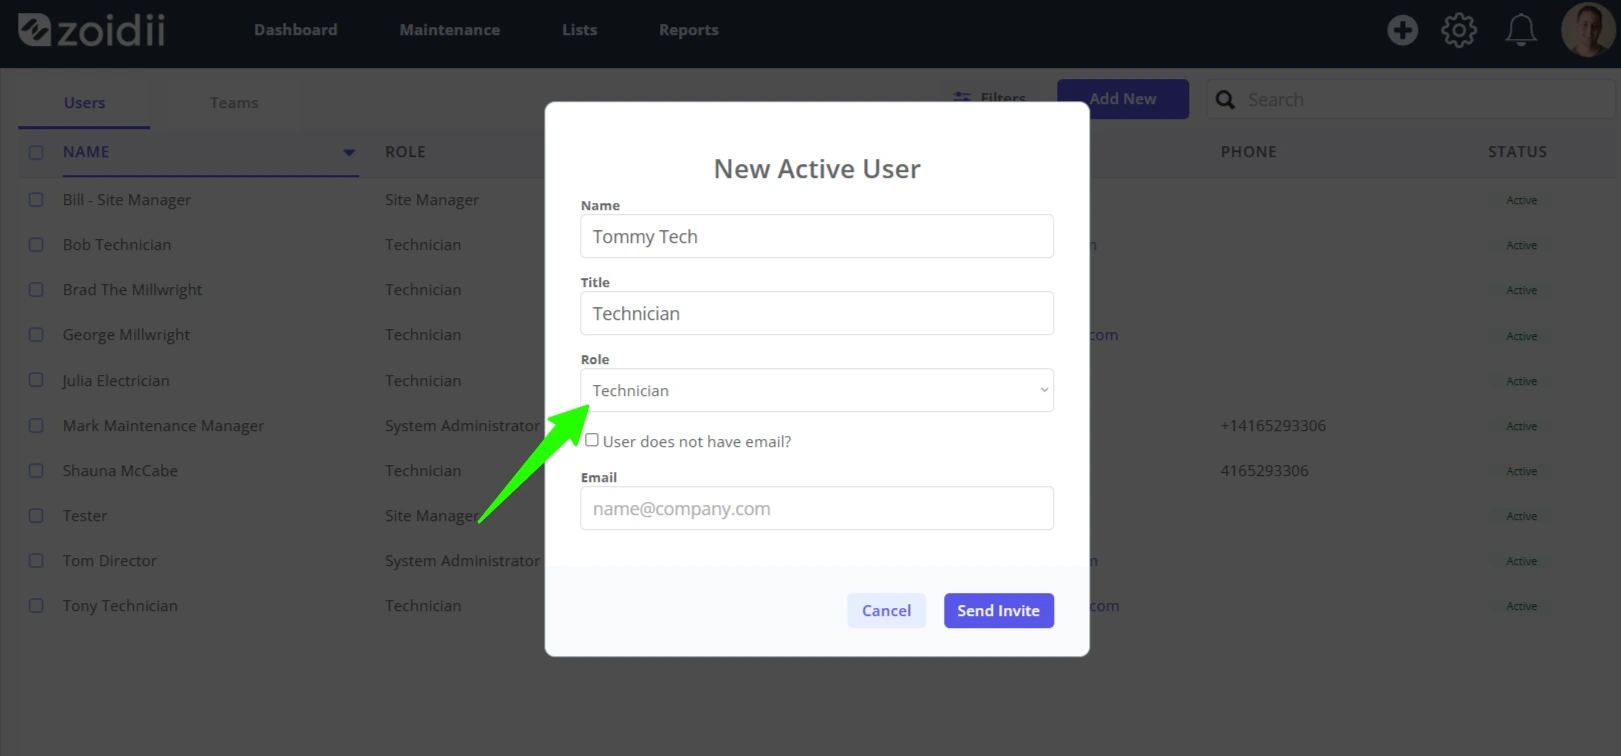
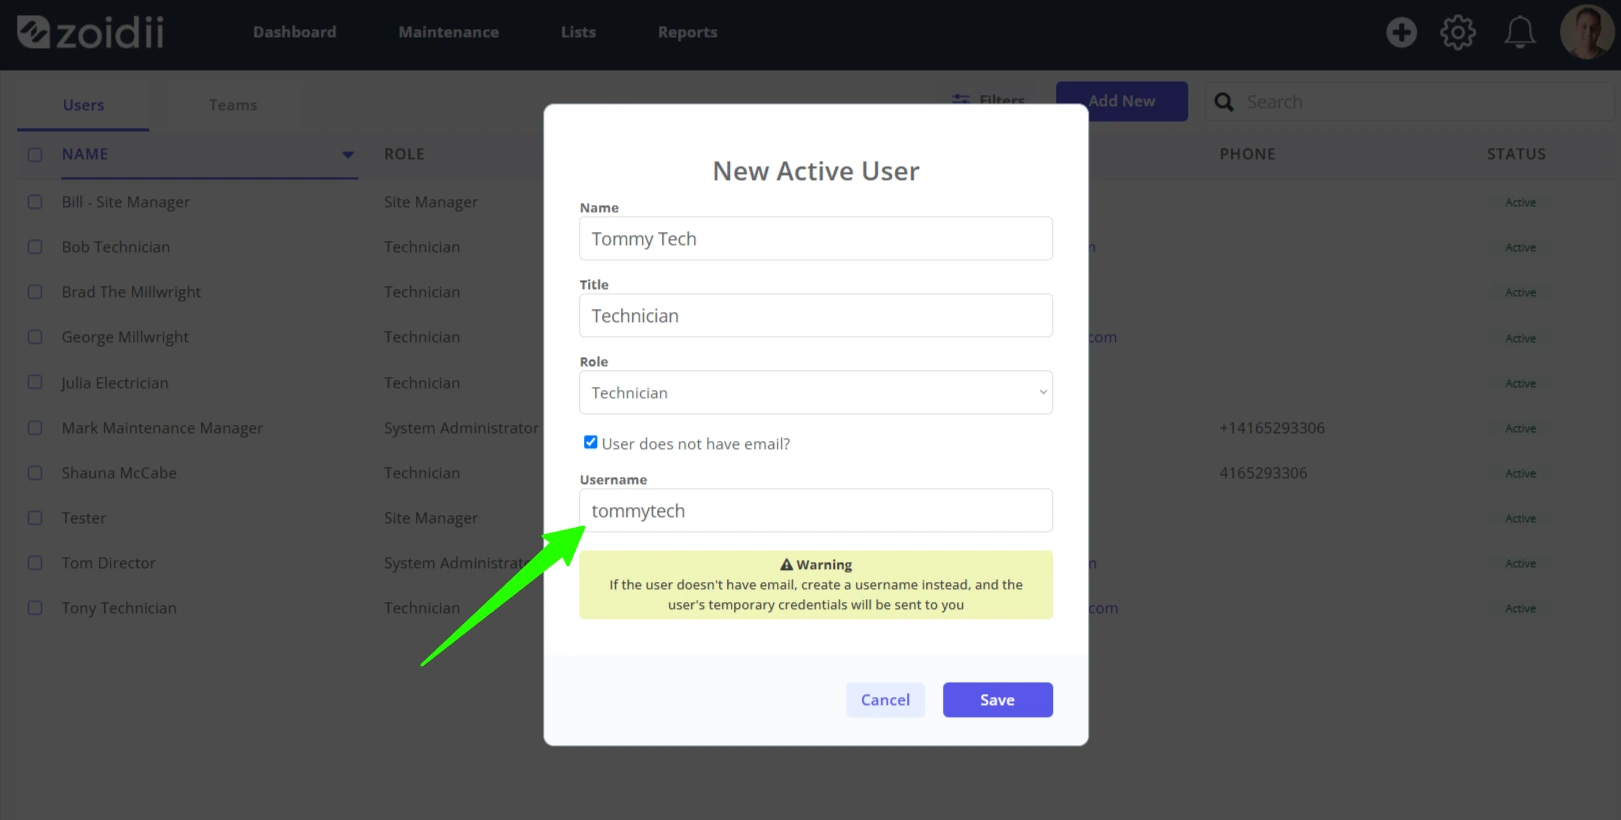
5. User does not have email checkbox - Zoidi can be accessed using a username or email. Usernames are ideal for those folks on the floor that don't have company email addresses.
if the user has a company email, leave this unchecked. Skip to step #8 if the employee does not have an email address
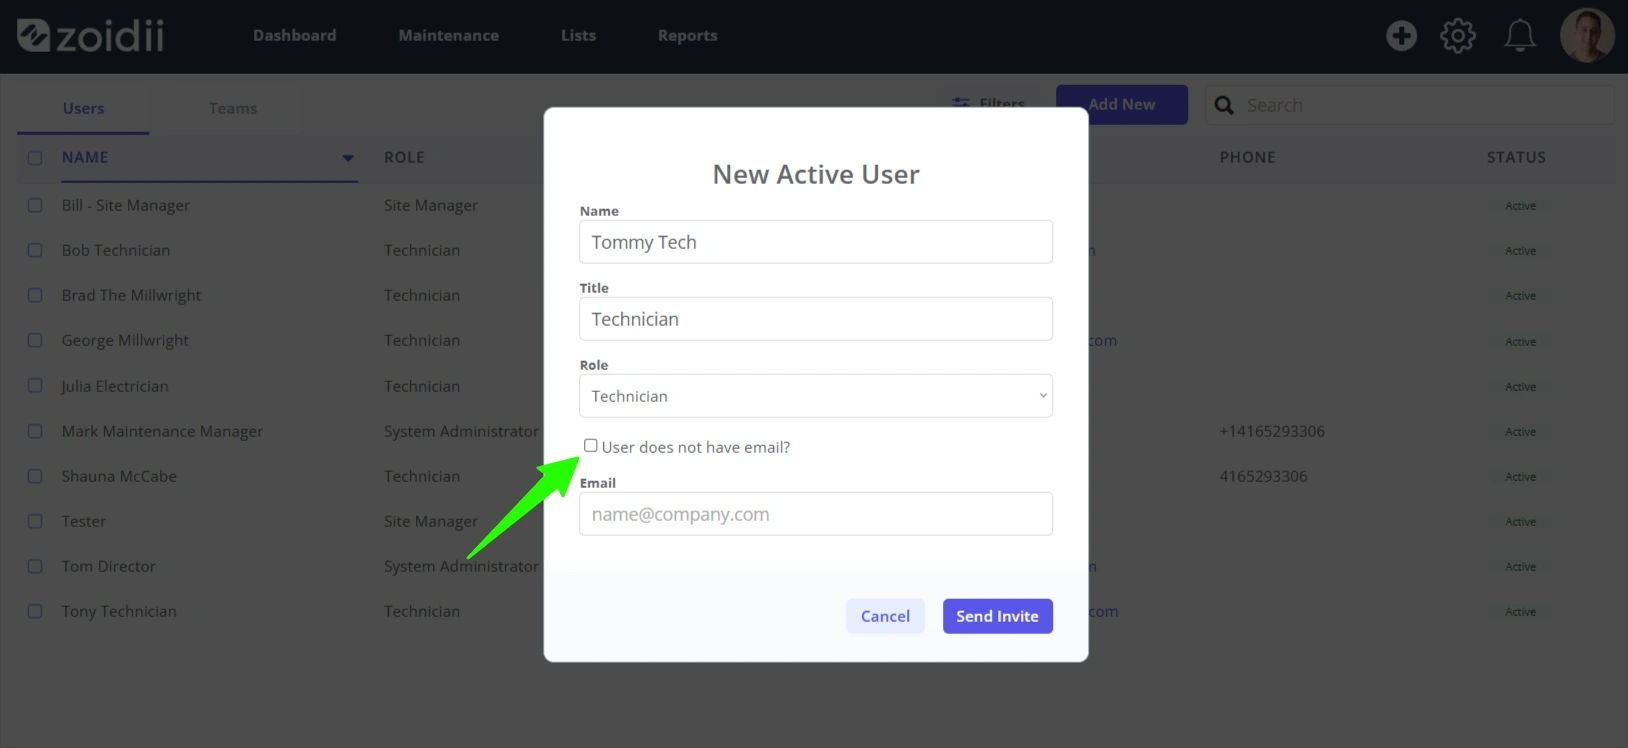
6. Add the user's email address
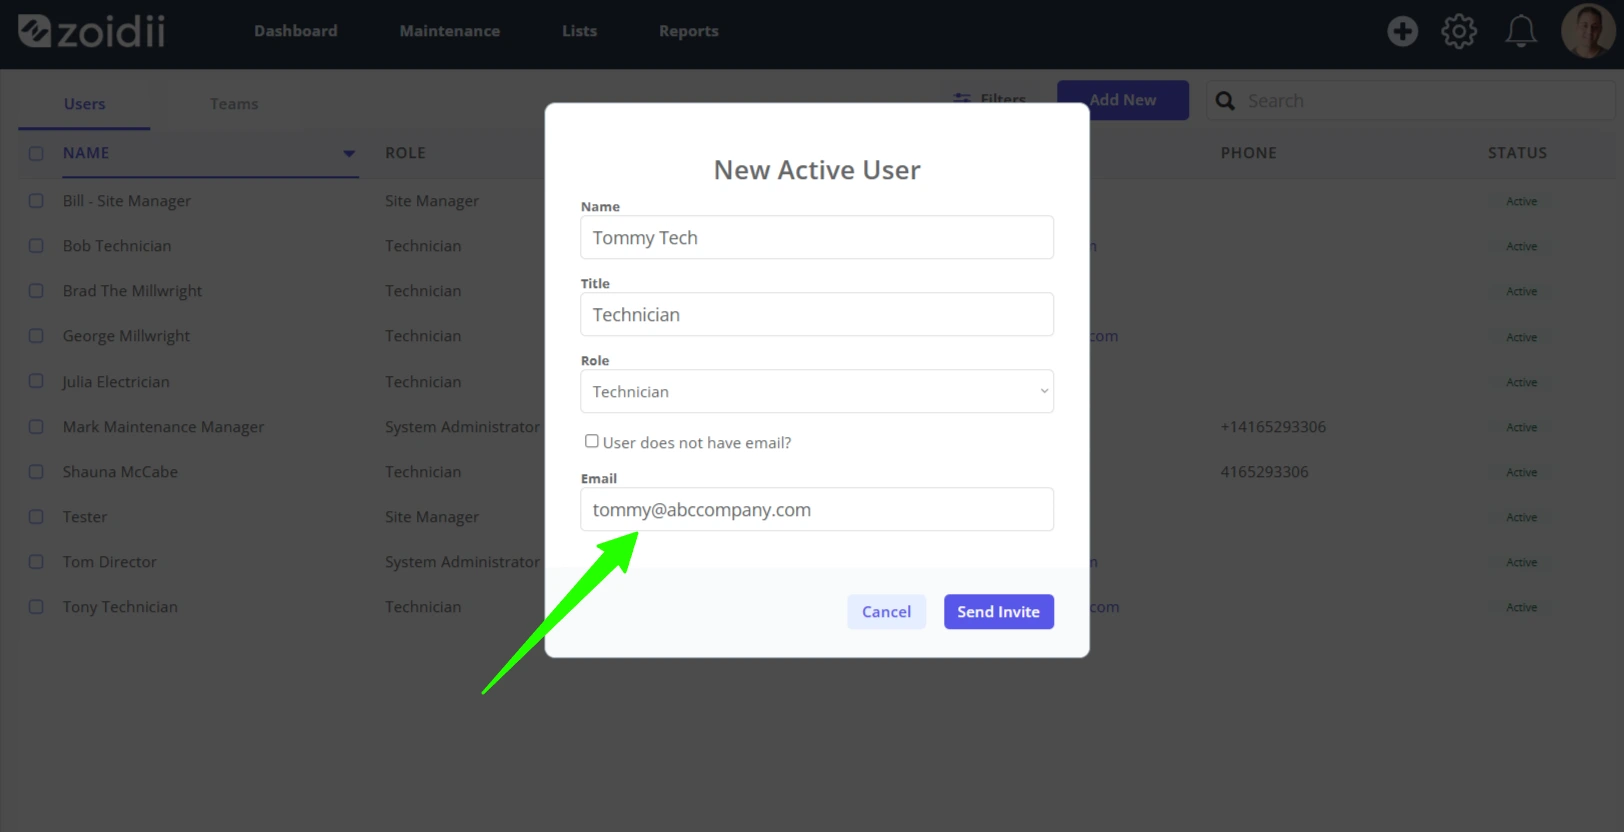
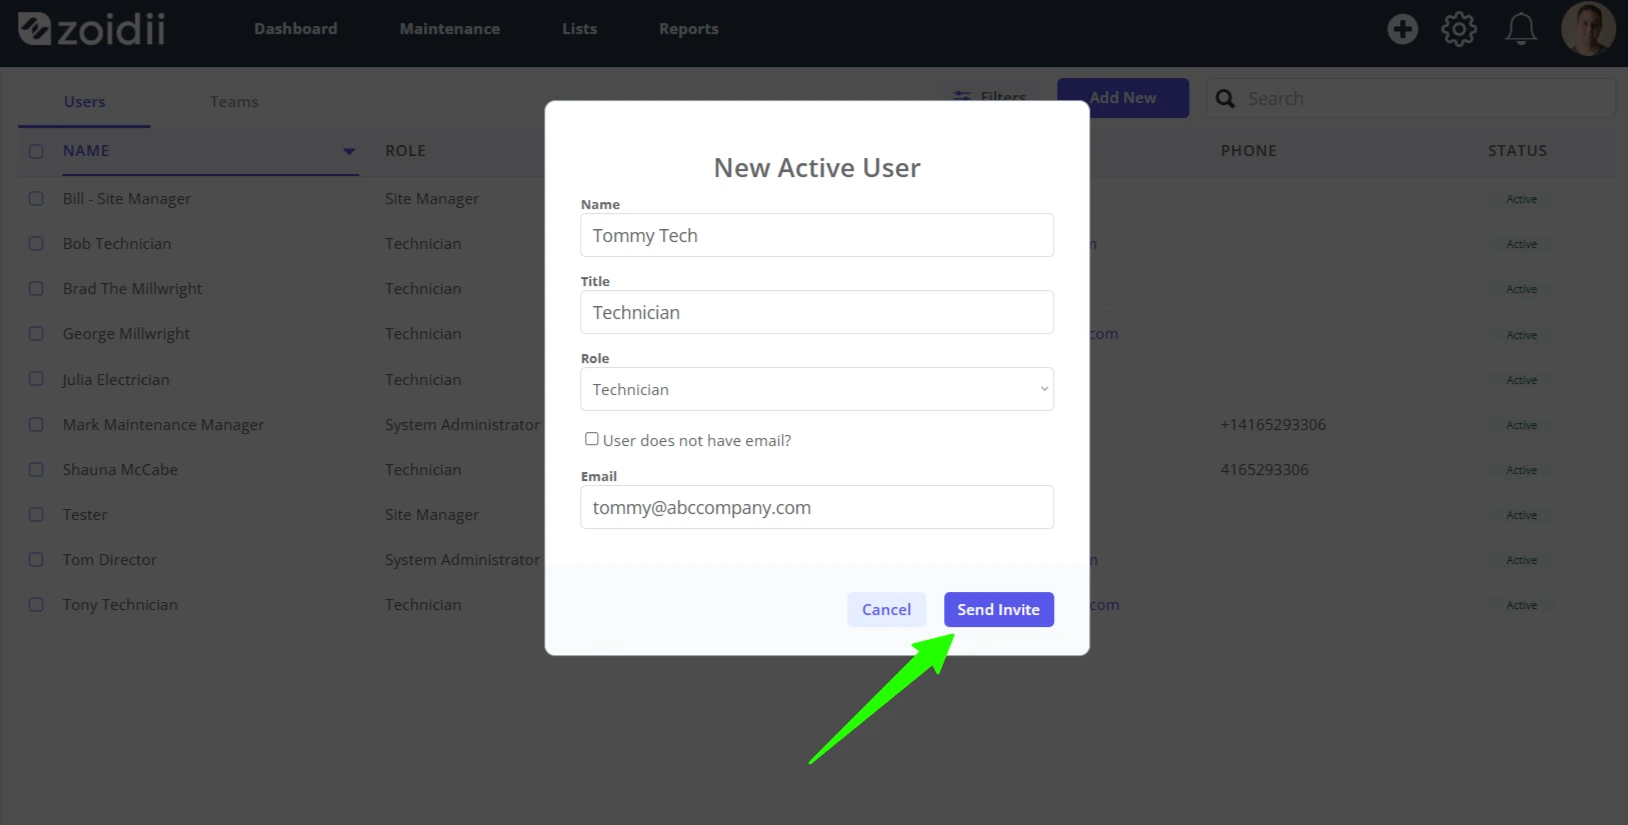
7. Click Send Invite when done. The user will be sent a welcome email with their login and password details.
8. If the employee does not have an email address, they can log into Zoidii using a Username. To set a user name, check the User does not have email checkbox.
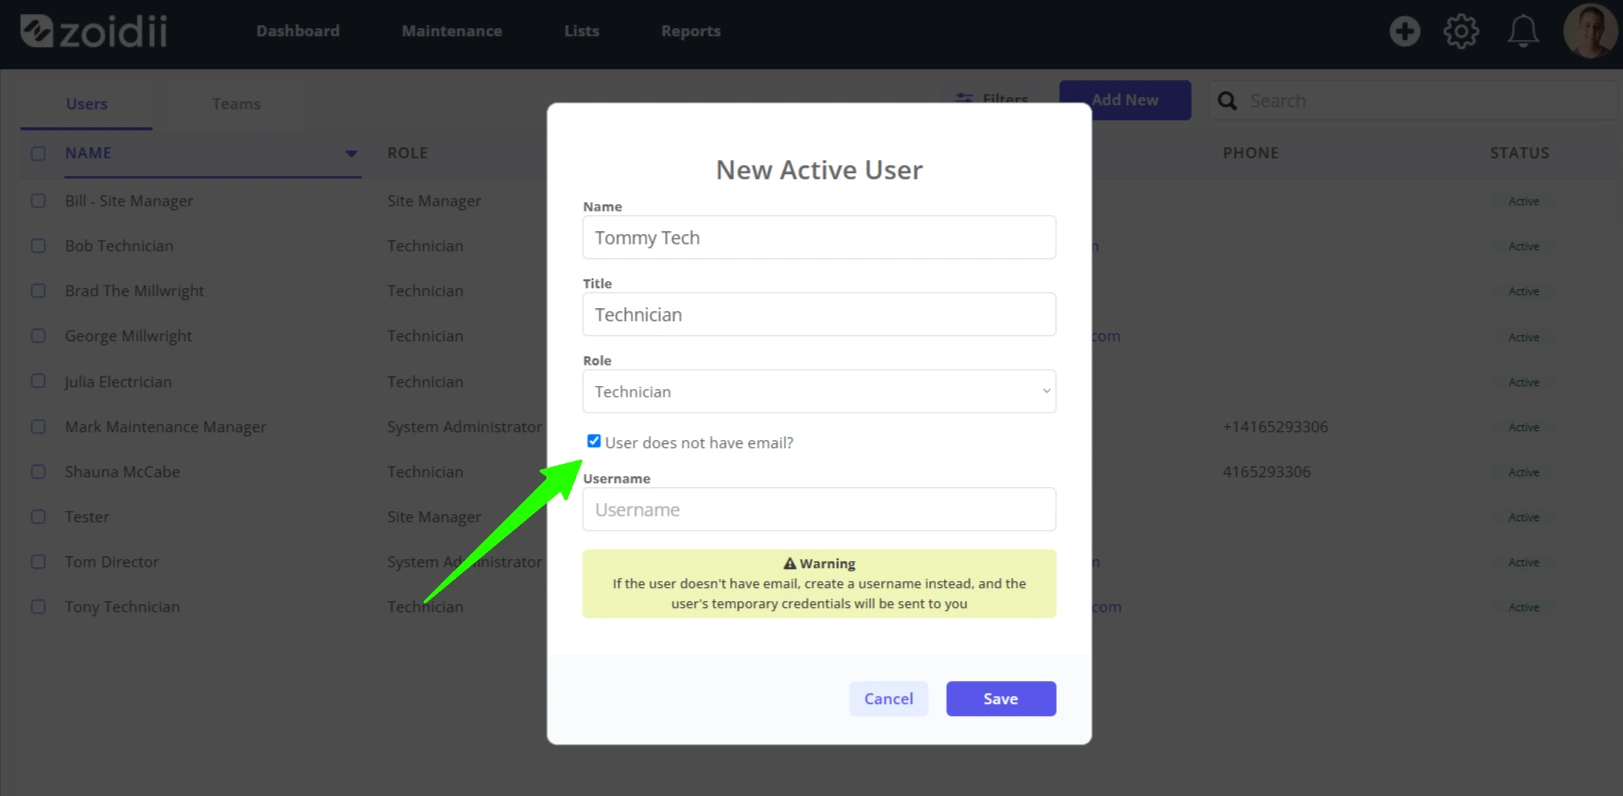
9. Add the Username. Note the username must be unique across all Zoidii accounts. If your first preference does not get accepted, try another username.
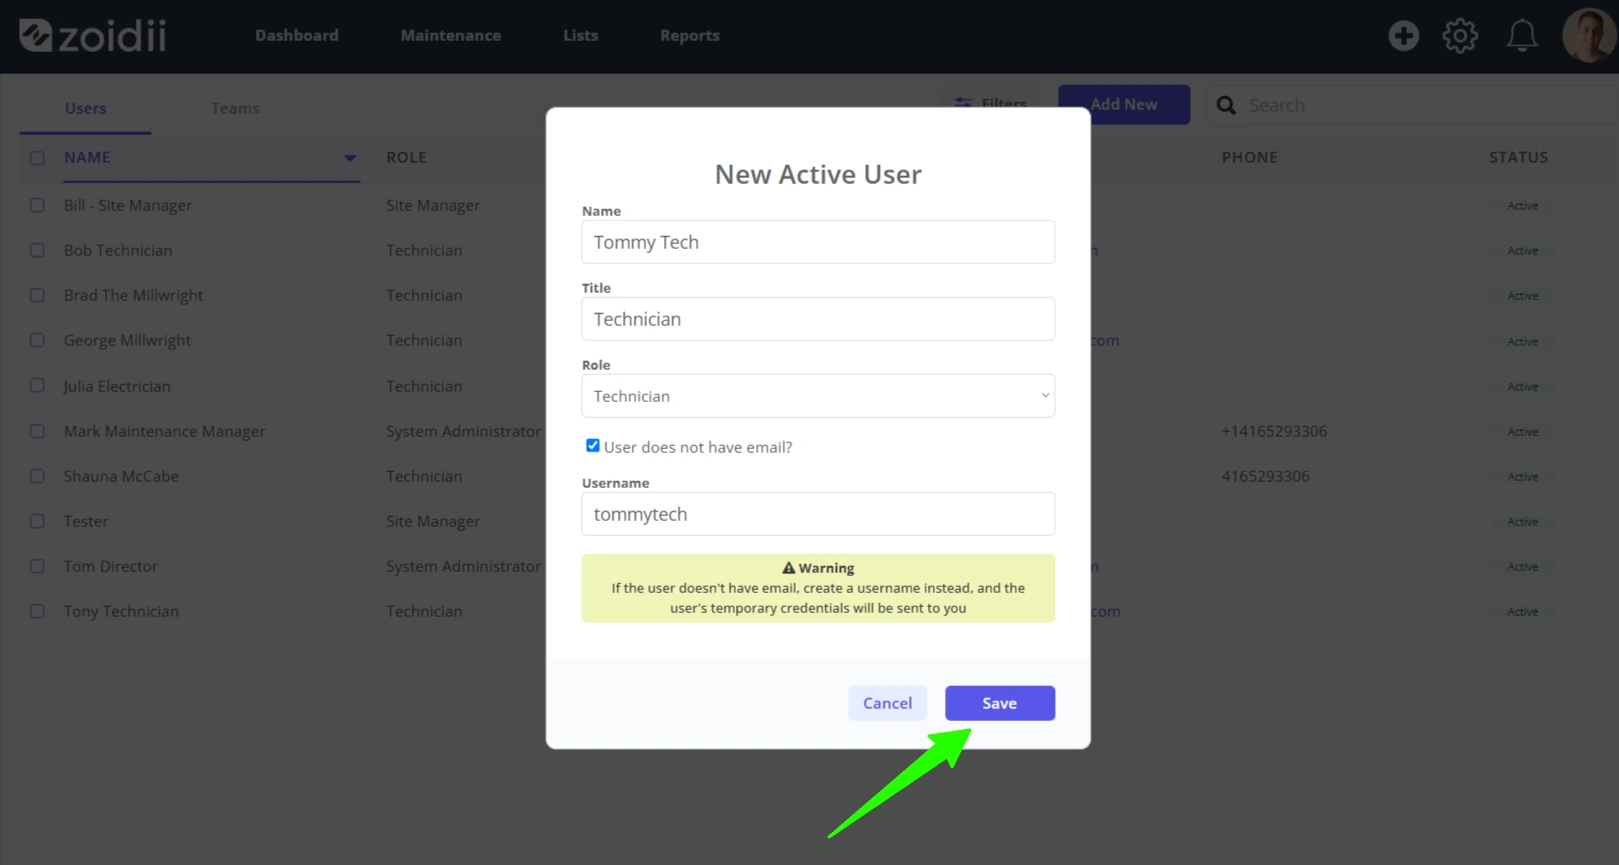
10. Click Save when done. As the user does not have an email, the user credentials will be sent to the individual that created the user. They can then print and distribute the credentials to the user.
11. When the new user logs in for the first time, they will be prompted to reset their password. They can also add a profile picture to their account.