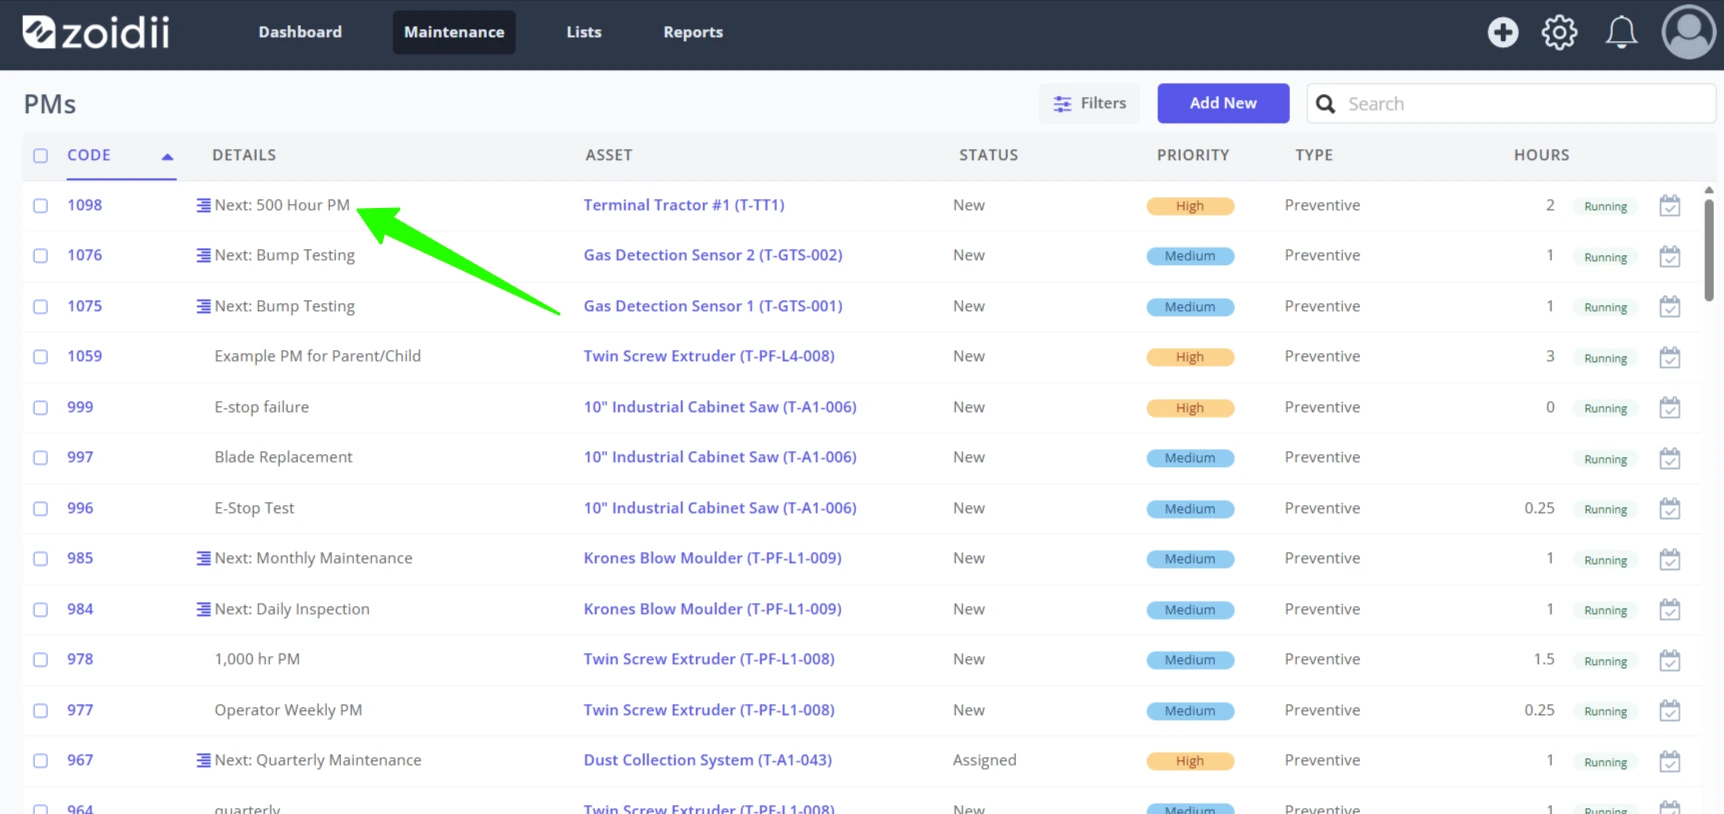

Background
Nested PMs allow organizations to incorporate preventive maintenance of increasing complexity and duration into one single PM. To the end-user, the PM grows and shrinks depending on its position in the schedule.Nested PMs functionality ships with the Enterprise tier. When you click New on the Preventive Maintenance page in Zoidii, you will see the option to create a nested PM.
Procedure
1. To create a Nested PM, navigate to the preventive maintenance page of the Zoidii application, and click Add New on the top right-hand side. Click New Nested PM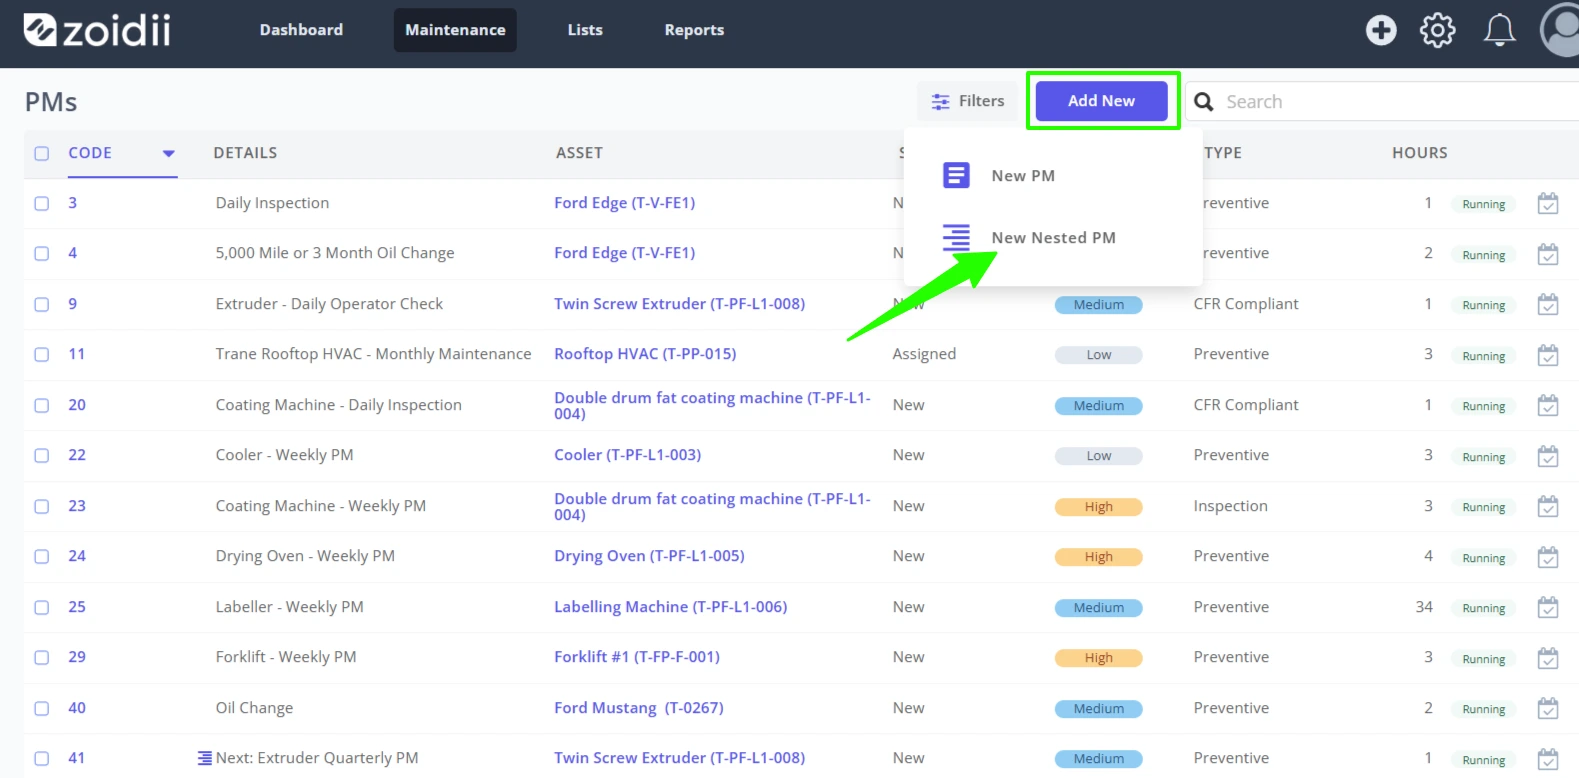
2. Select the asset from the list, and fill in the baseline PM details.
Definition:- The "Baseline PM" is the shortest PM interval on the asset. For example, say an asset has a 250hr, 500hr, and 1000hr PM, then the baseline PM is the 250hr PM.
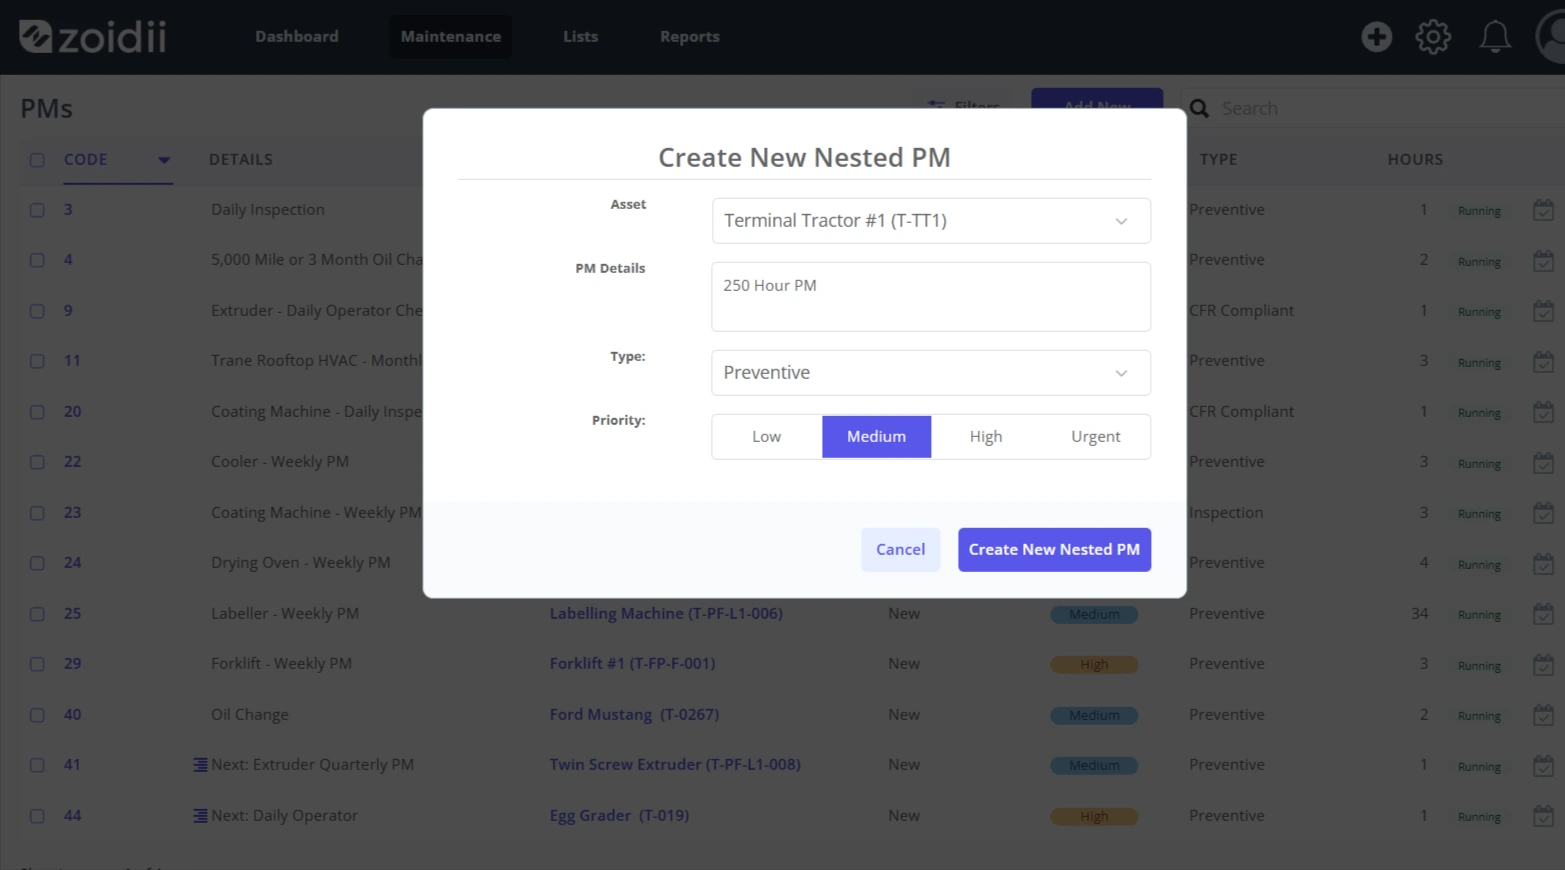
3. Click Create Nested PM
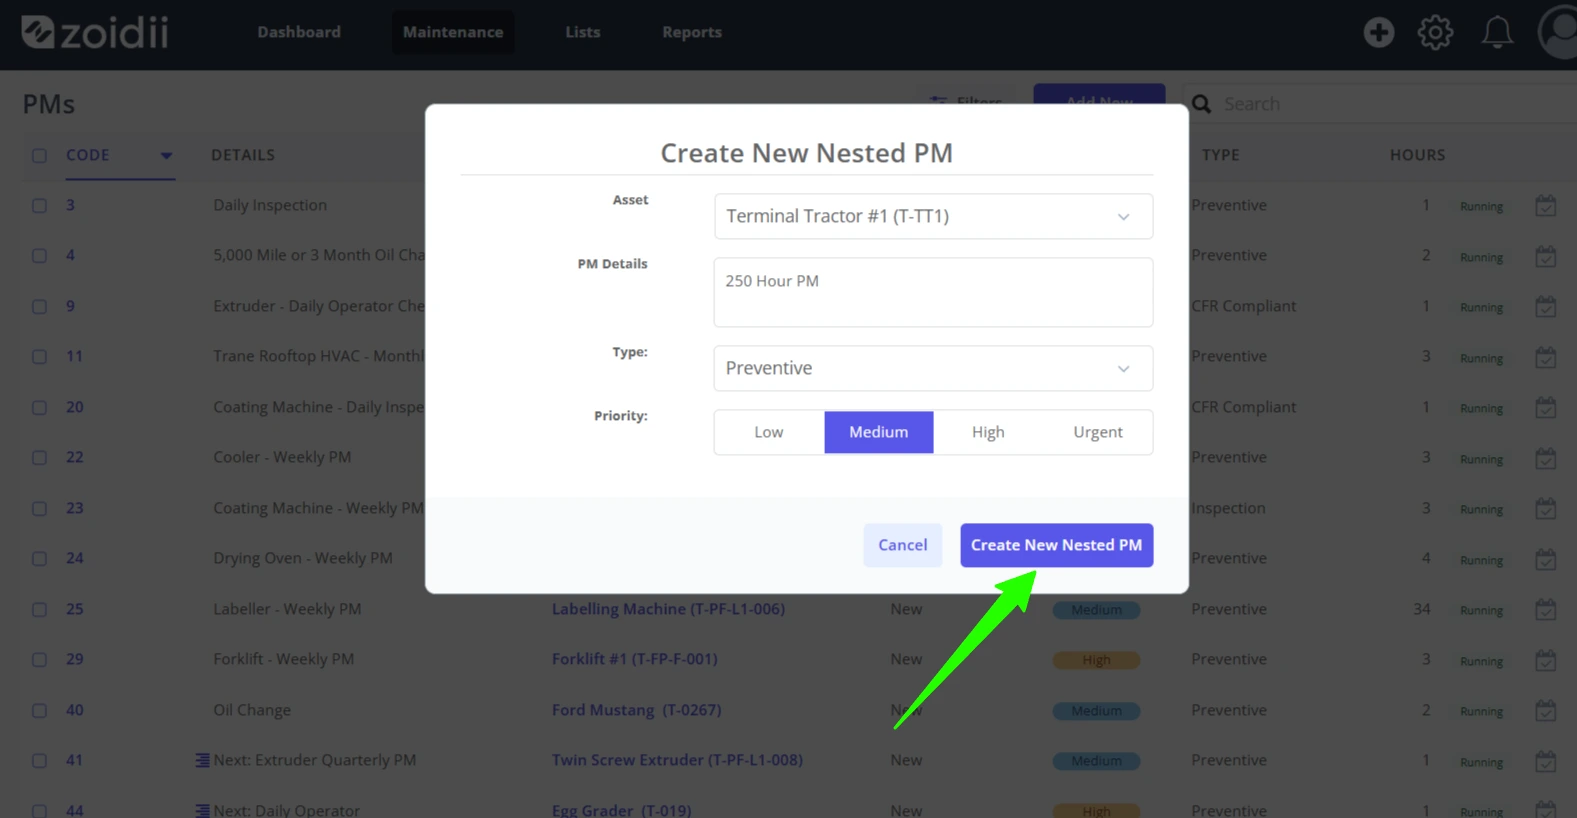
4. Continue configuring the baseline PM just like you would for a standard PM. Navigate to the Trigger tab to add the baseline trigger. Click Add New
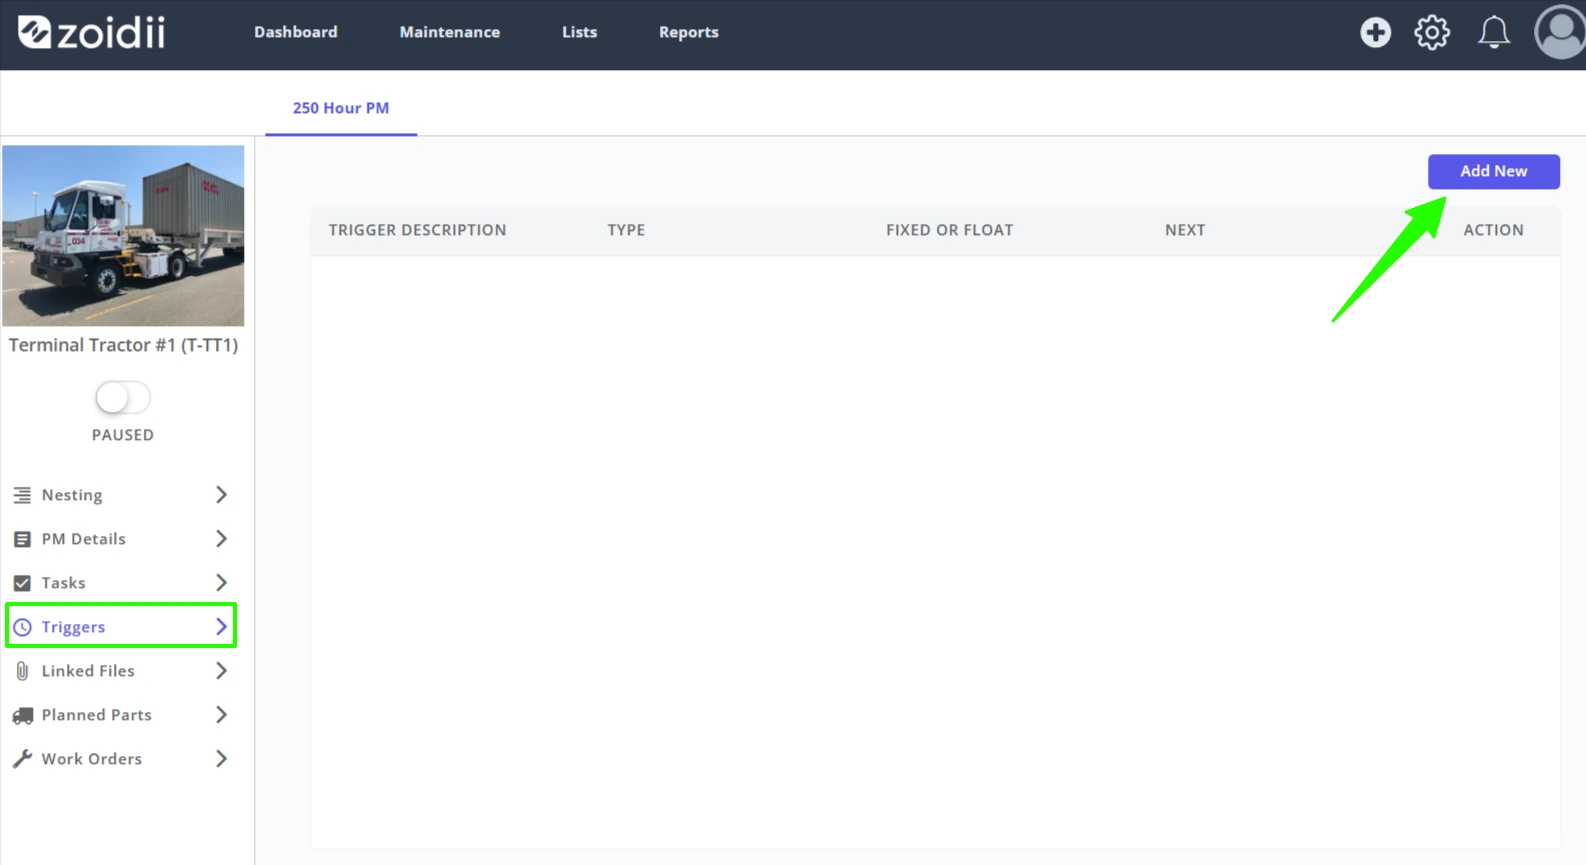
5. In this case, we'll configure a 250 hour PM trigger. Click Save when done
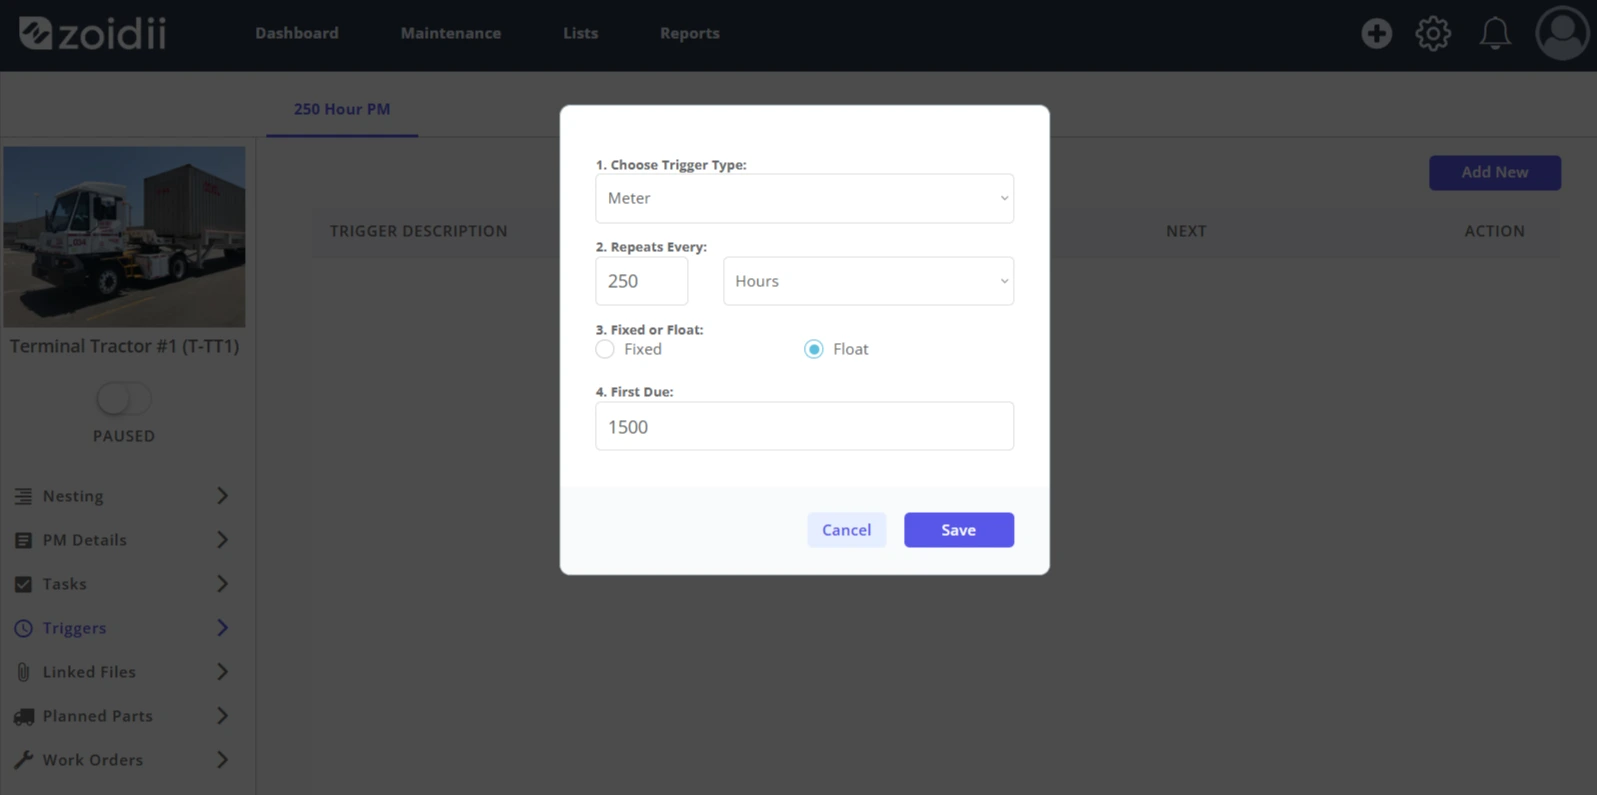
The baseline trigger is now set.
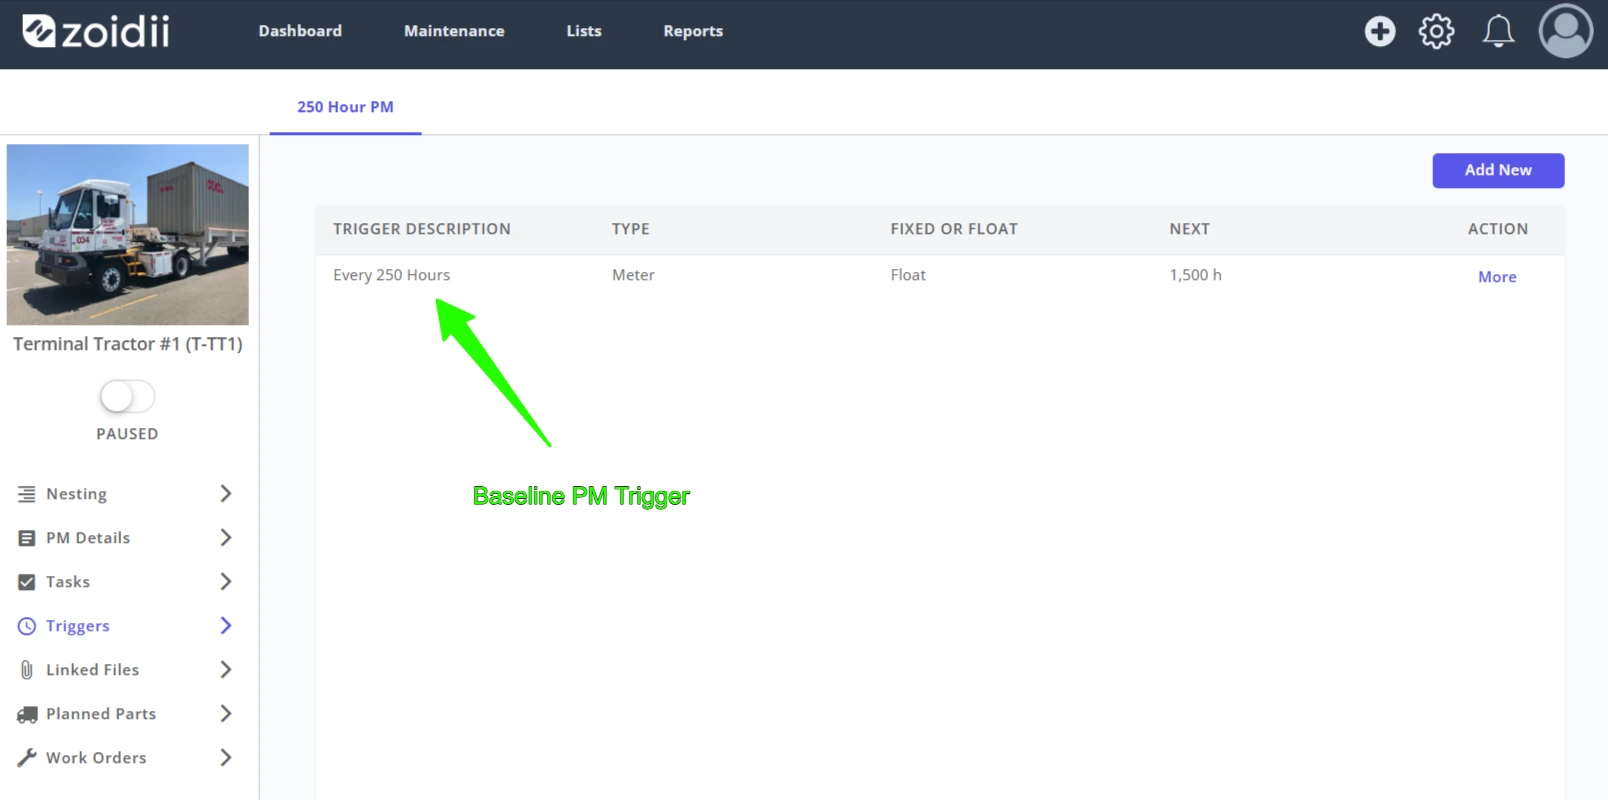
6. Navigate to the Tasks tab to add the checklist for the baseline 250hr PM. Click +Task or +Checklist on the top right-hand side. The best practice is to work with checklists.
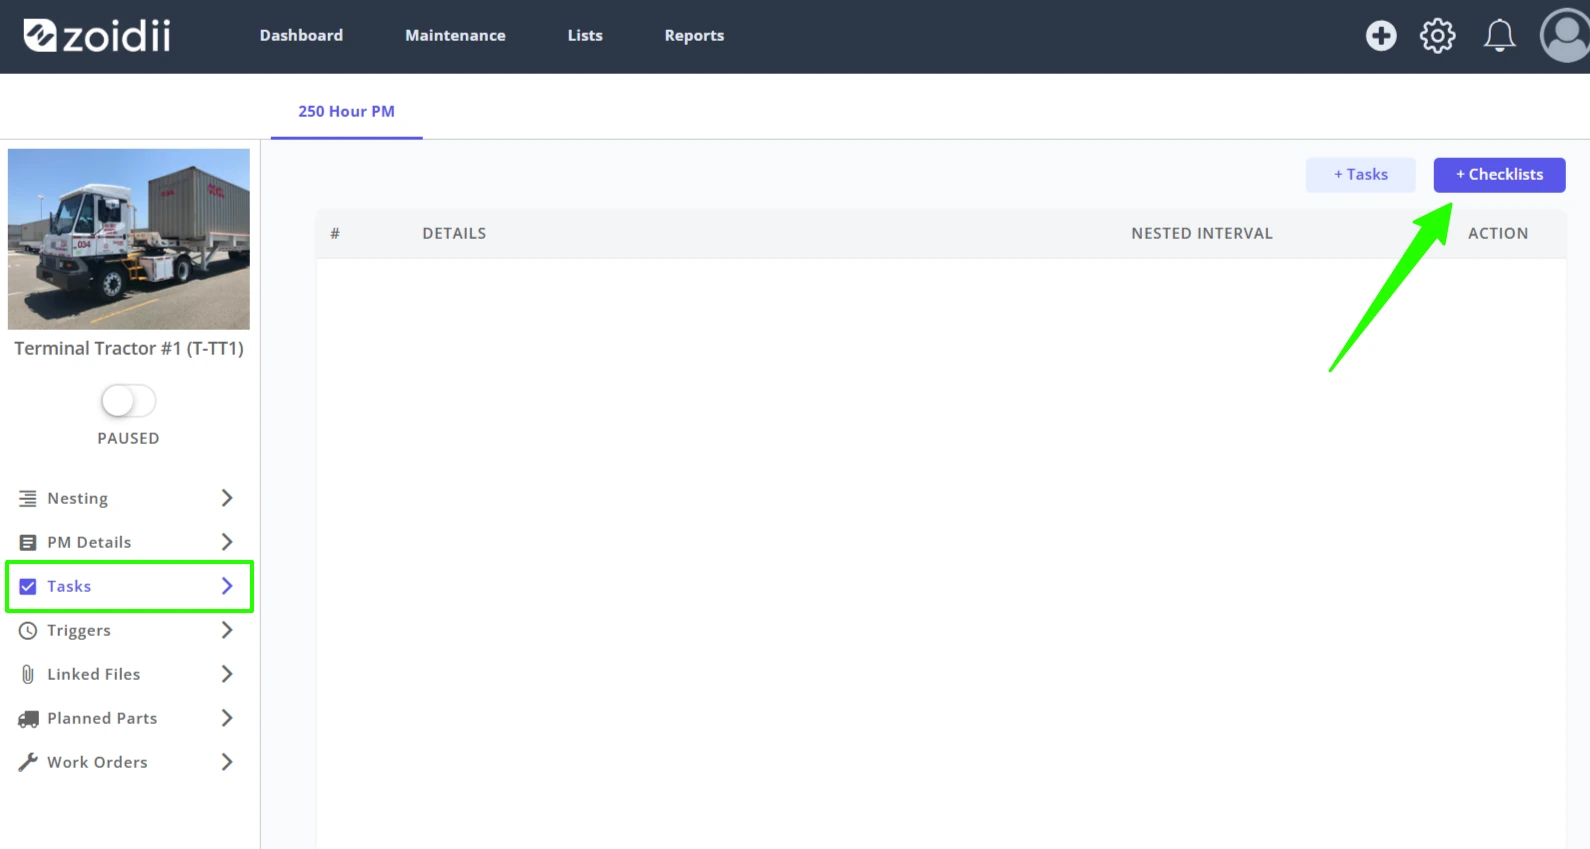
7. Select the baseline checklist from the list and click Save. In this case, it's the 250hr PM checklist for the Haas CNC.
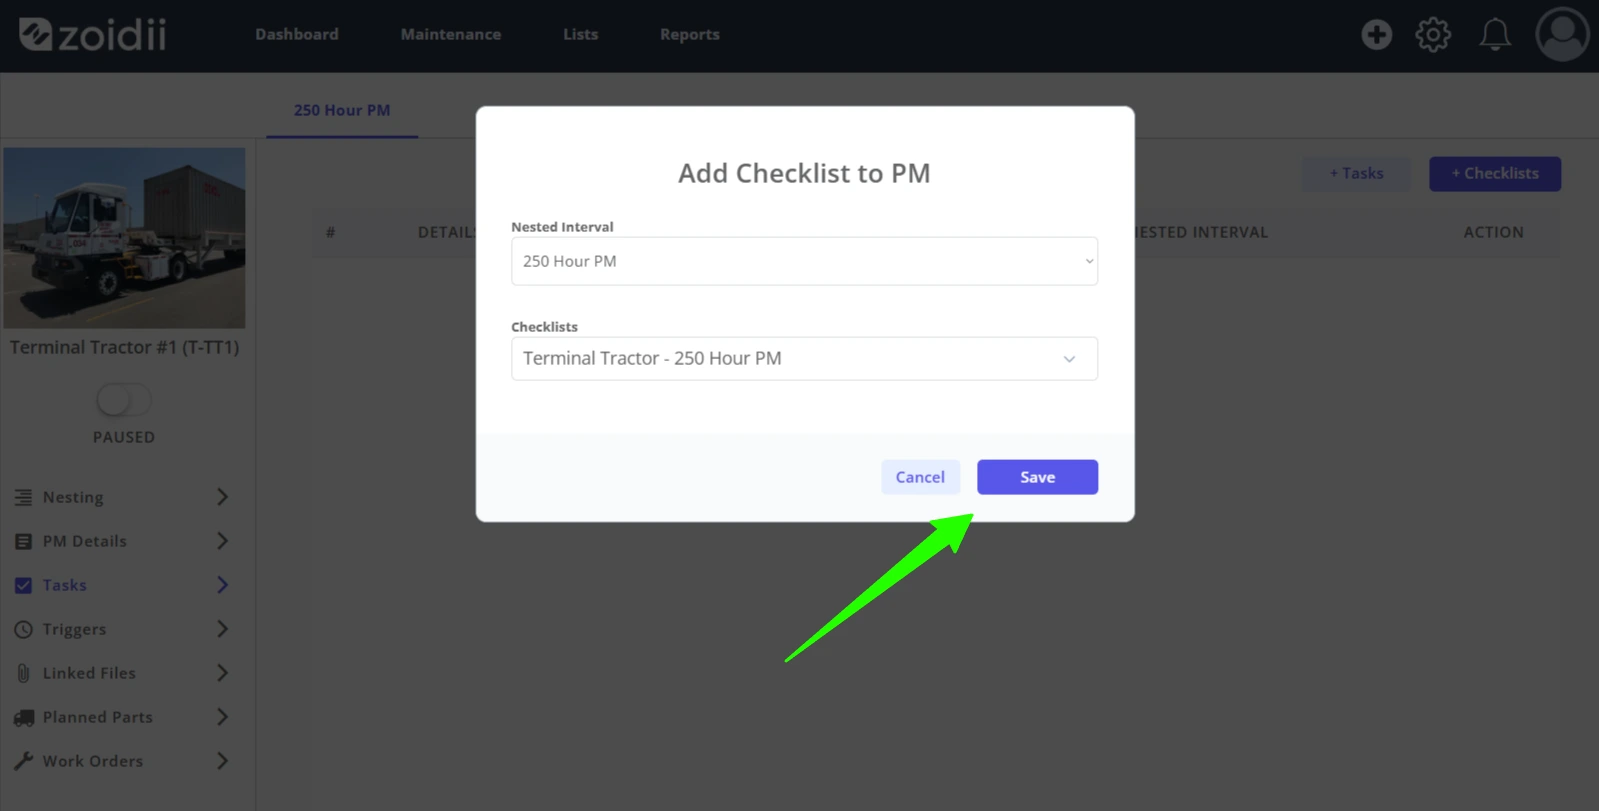
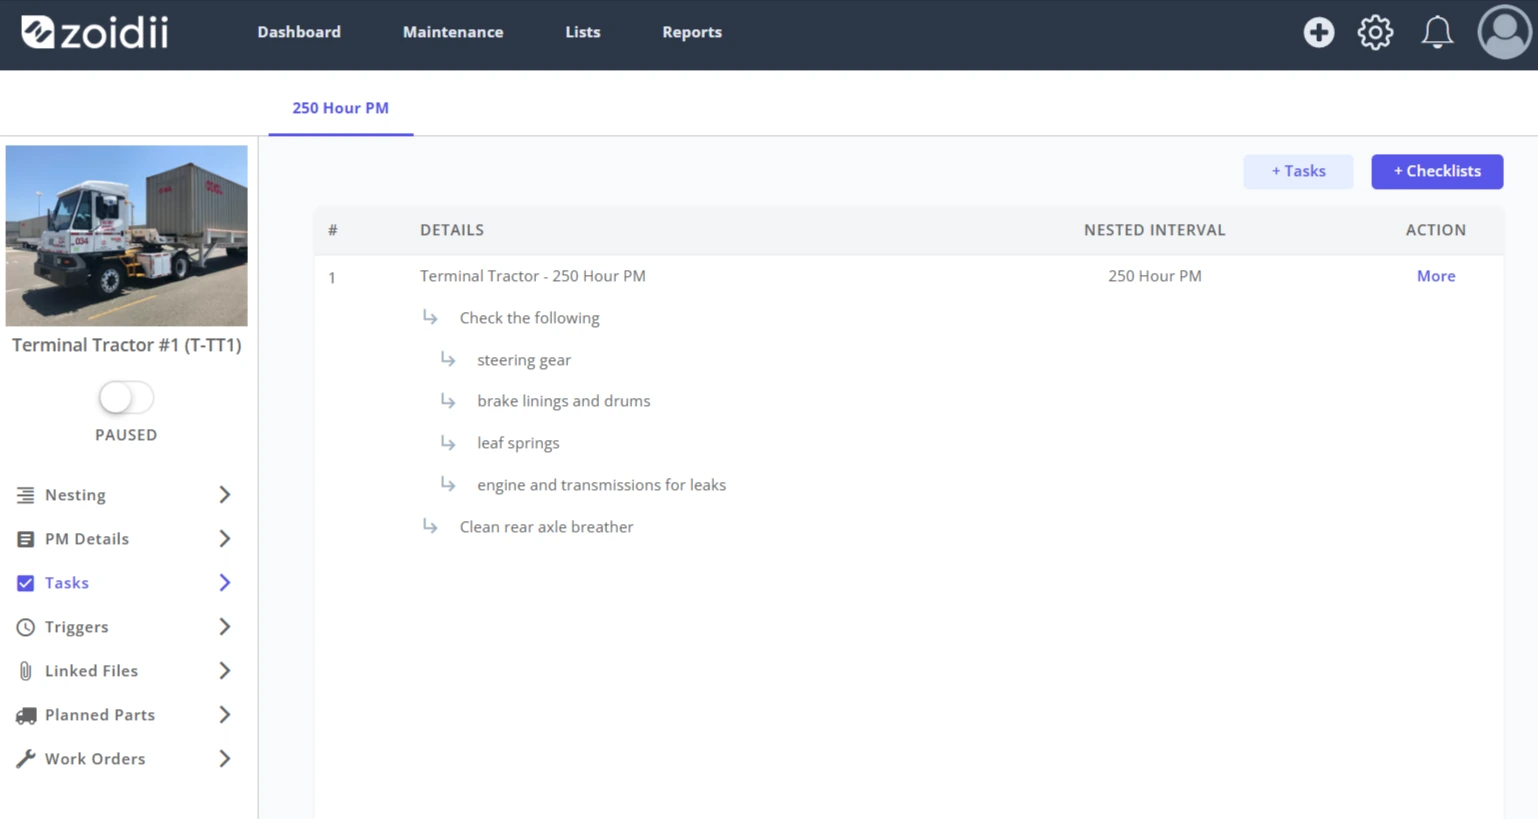
8. Once your checklist is added, it should look like the following:
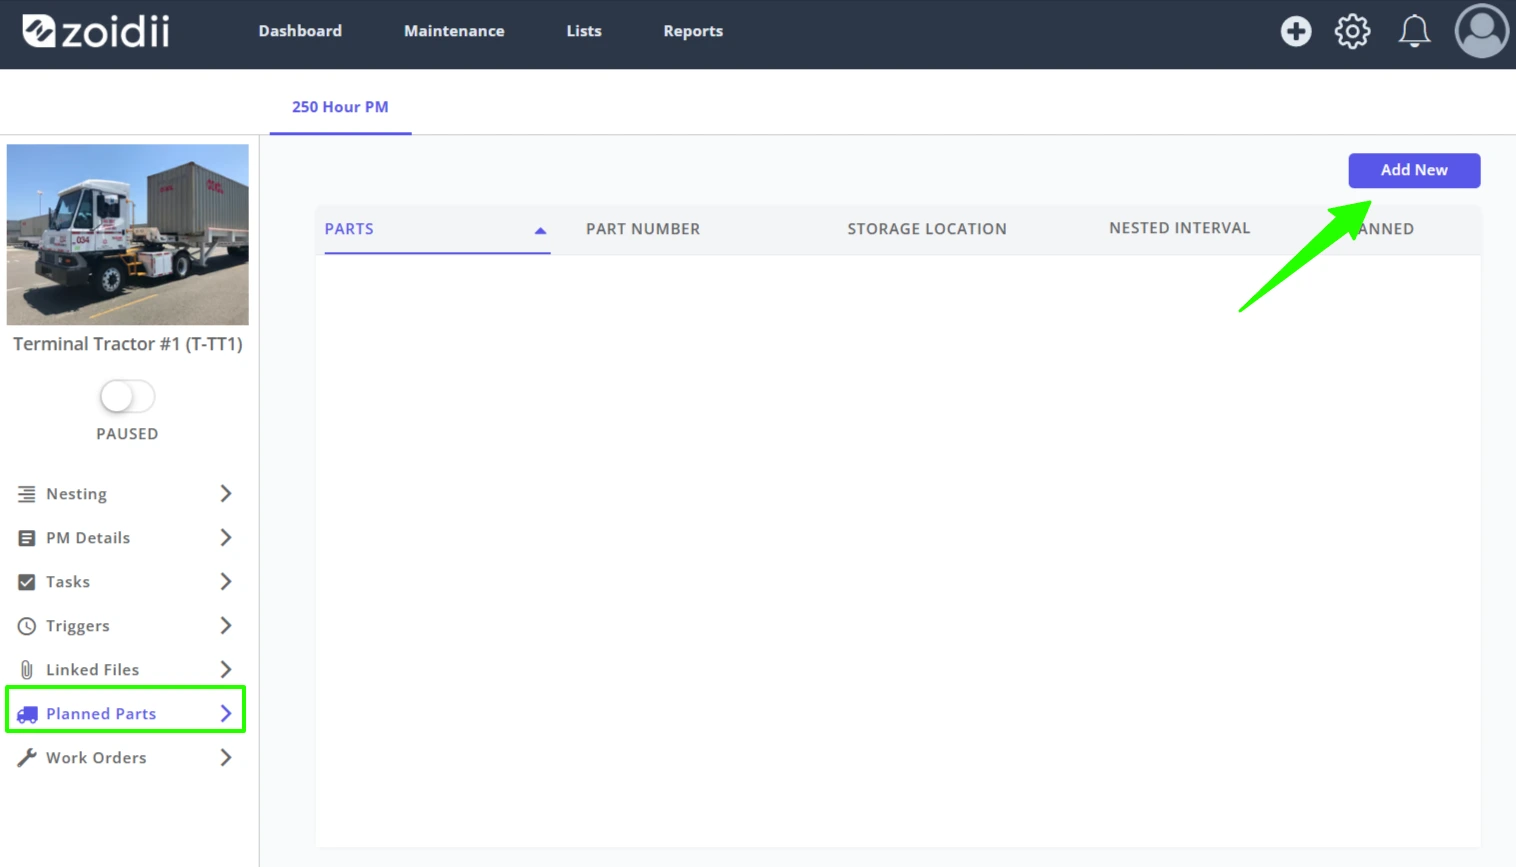
9. Navigate to the Planned Parts tab to add parts
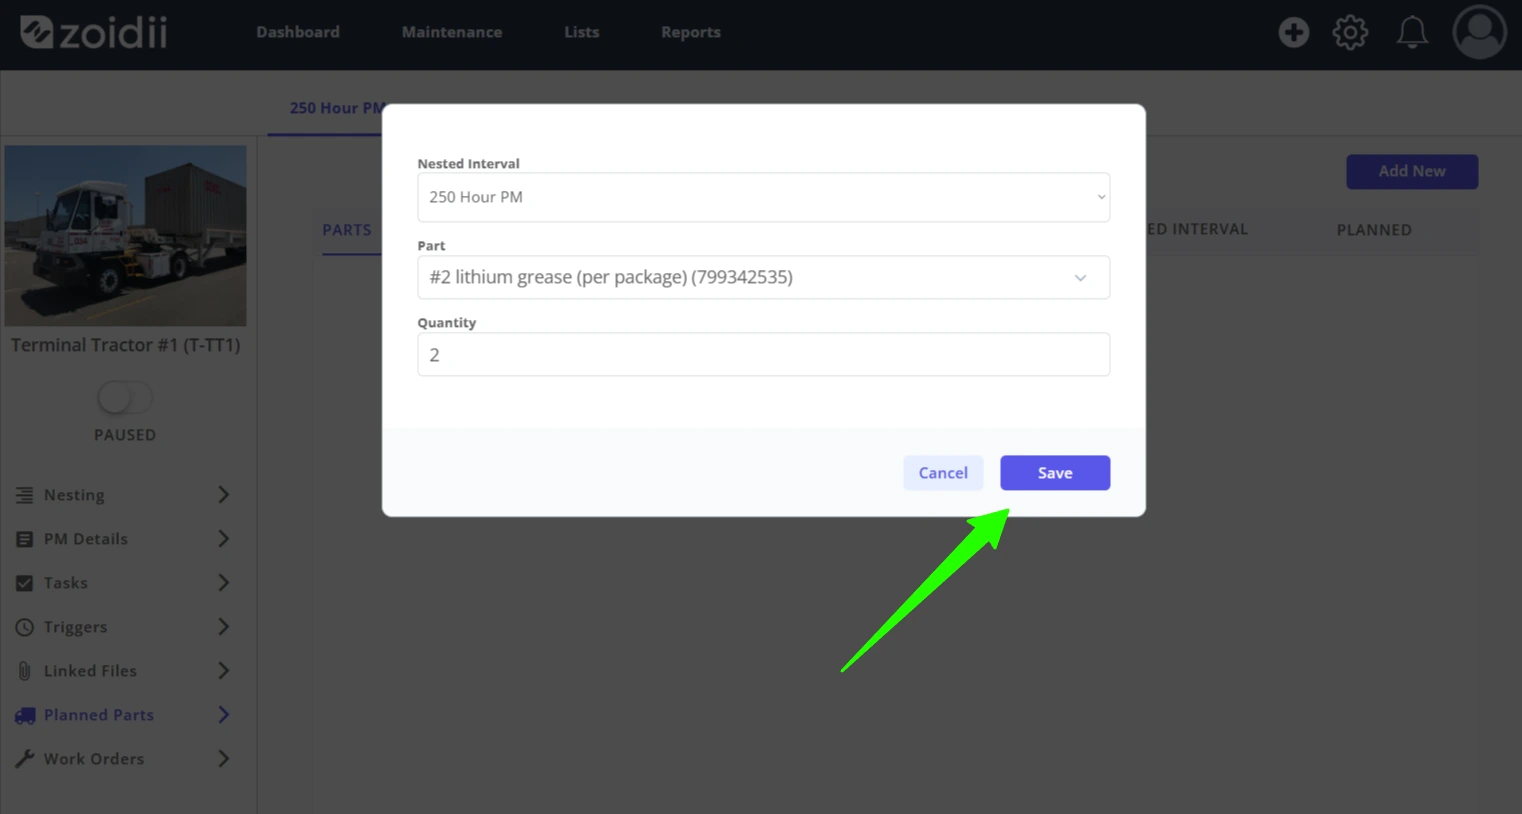
10.1 Select the part from the list, add planned quantity and click Save
11. Once your parts are added for the baseline PM, it should look like the following:
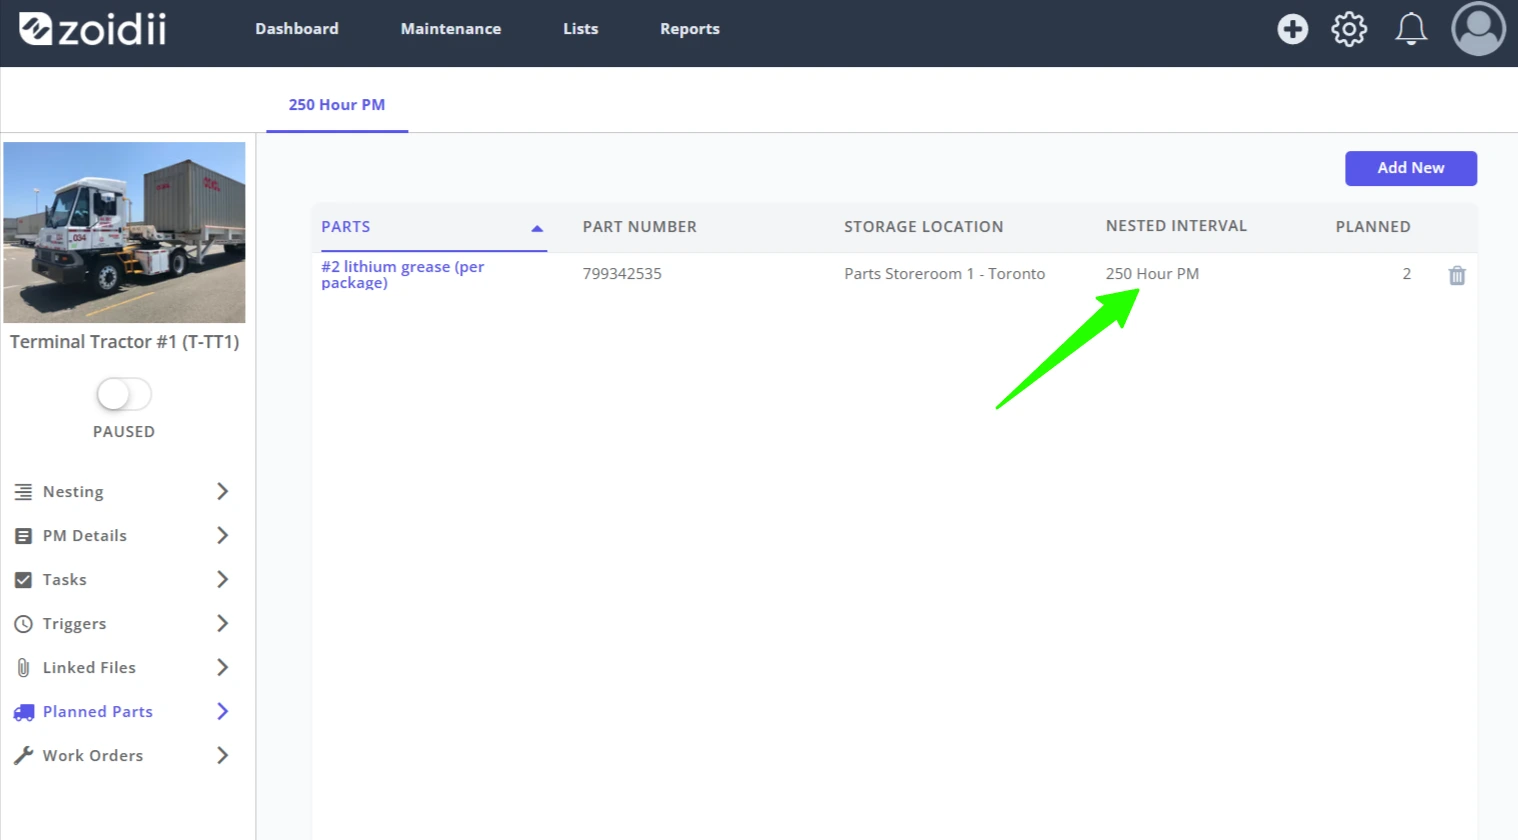
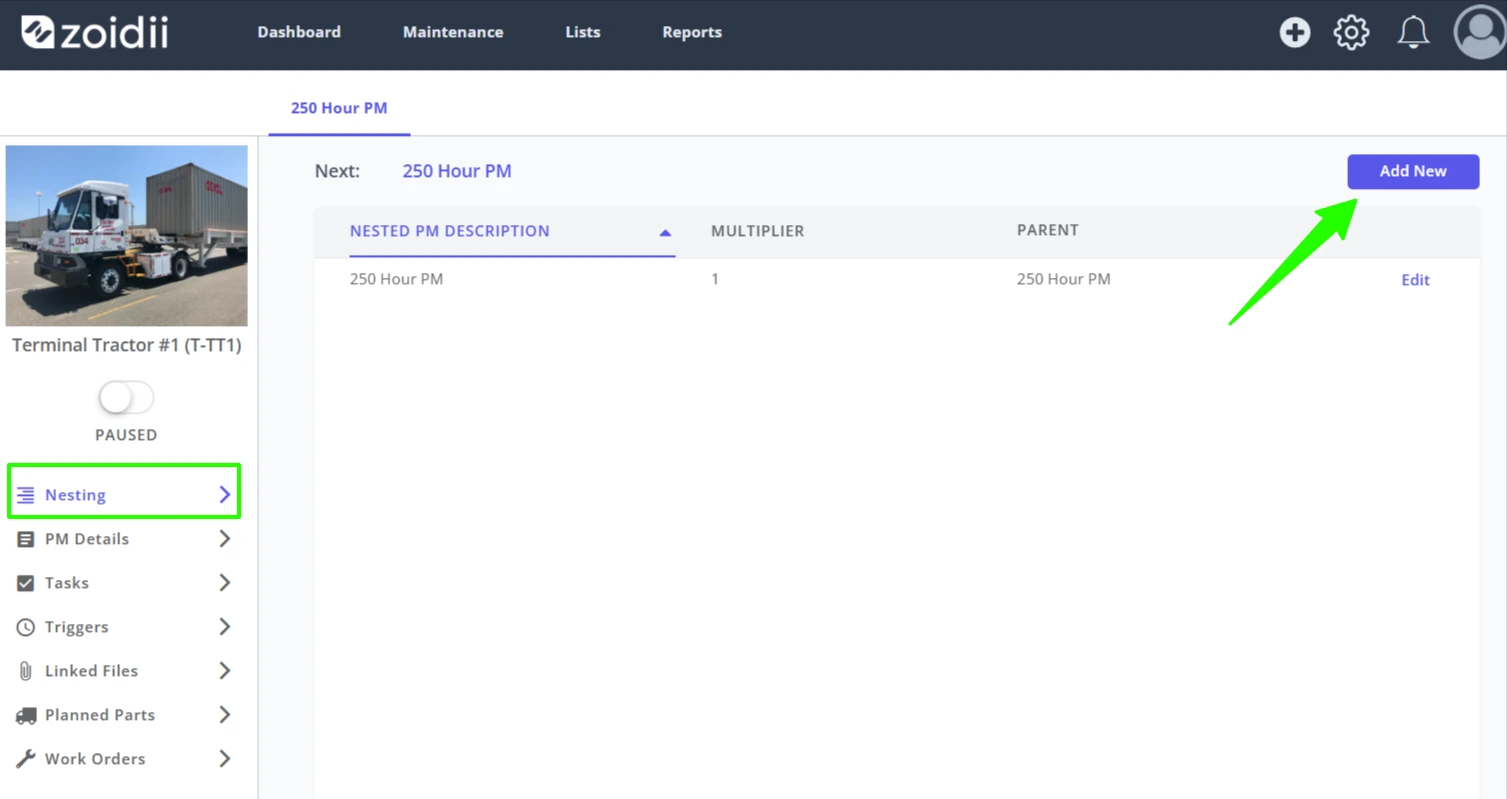
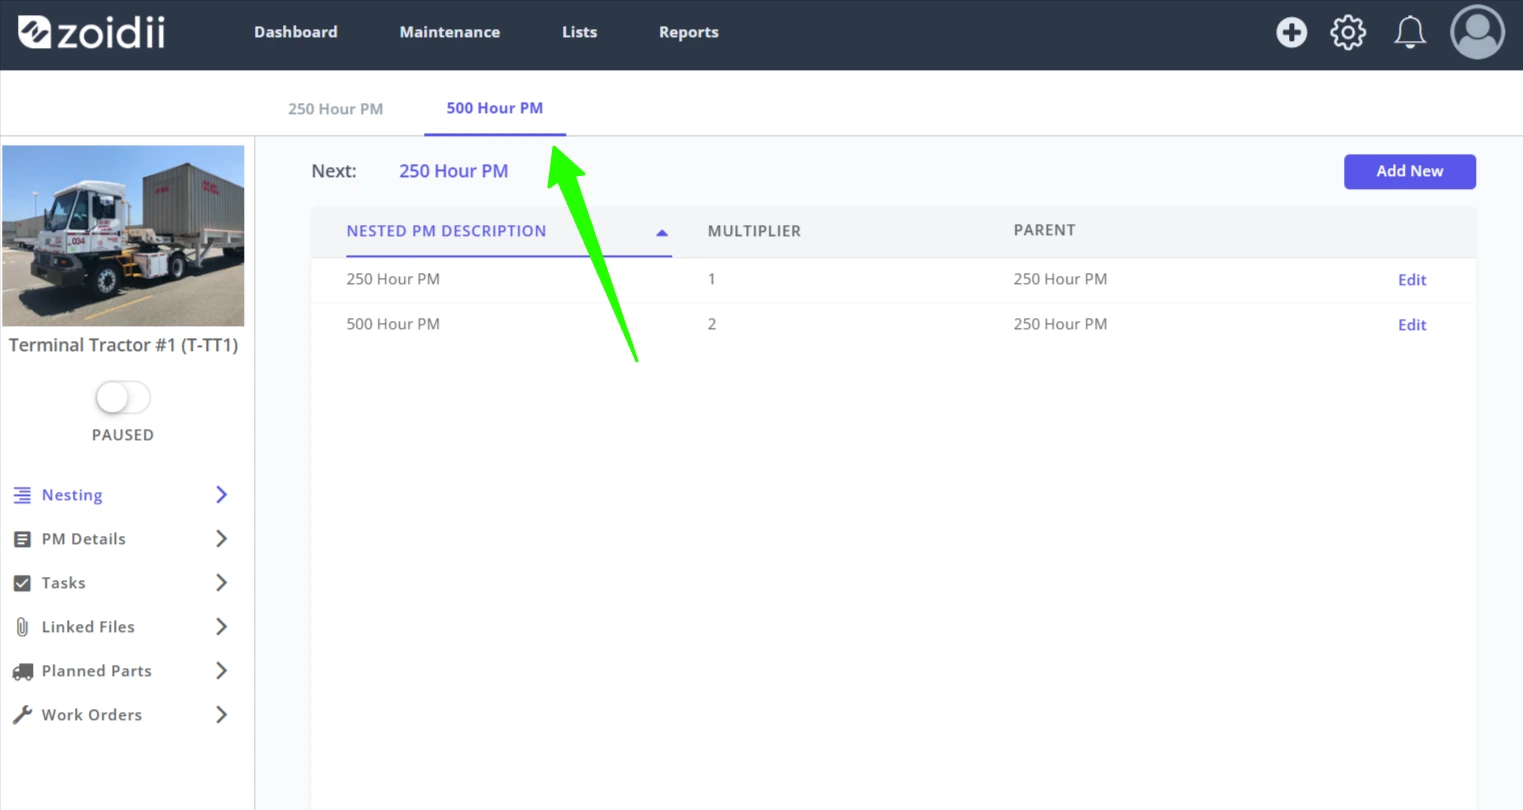
12. It's now time to add a new nested iteration. Navigate to the Nesting tab, and click Add New
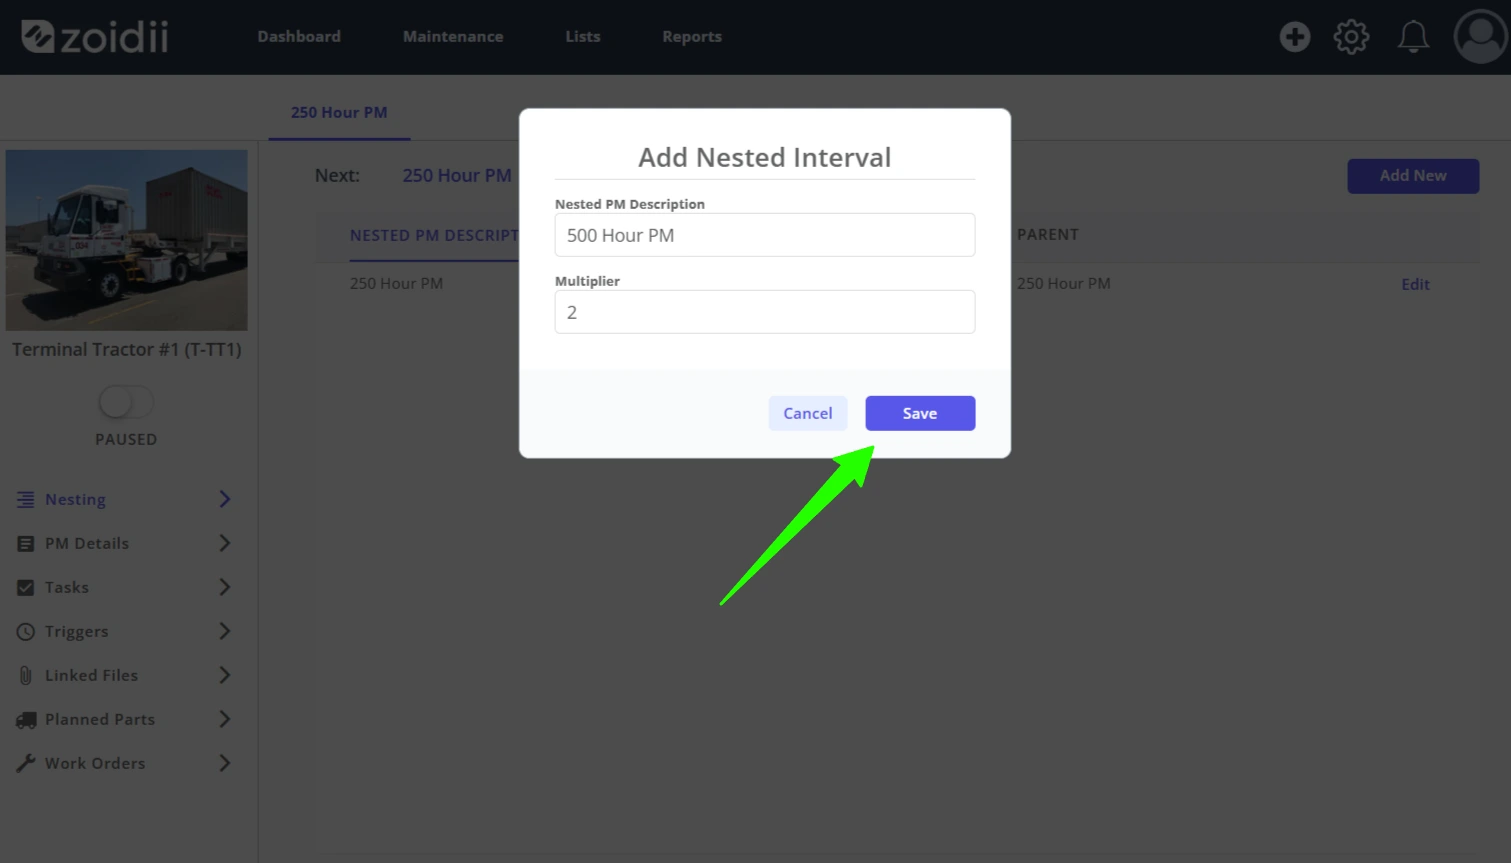
13. In the Nested Interval popup, give the nested interval a PM description. In this case, it's 500hr PM. As the 500hr happens every second 250hr PM, the multiplier is set at 2. Click Save when done
Note: we do not set triggers for each nested interval. The PM always fires off the baseline trigger.
Another way of defining Multiplier is "This PM happen every X times the baseline PM.
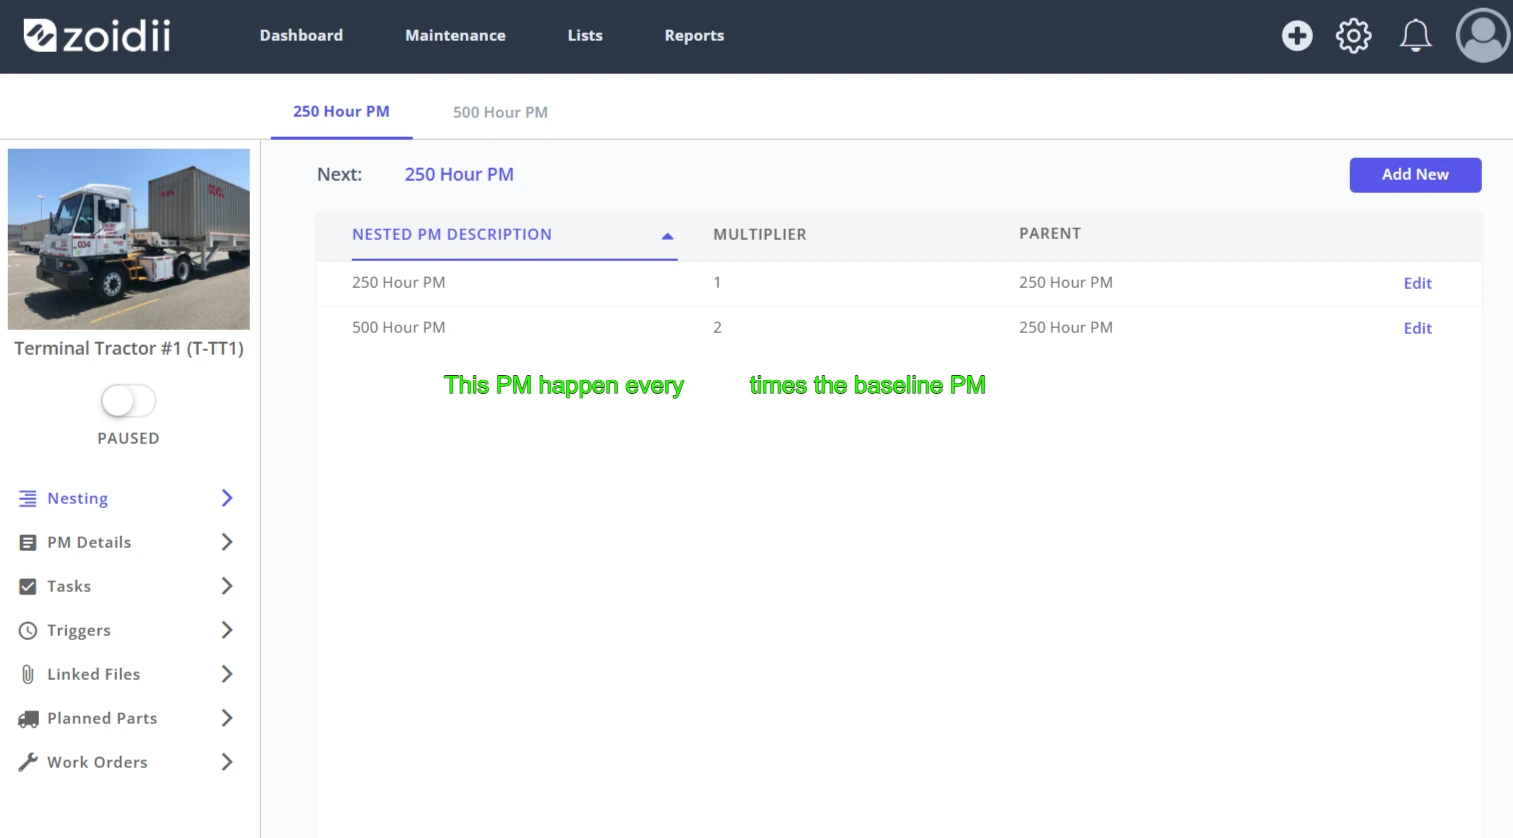
13. You'll notice the new tab appears at the top of the Nested PM screen. Click the new tab to configure the PM settings for that nested PM interval.
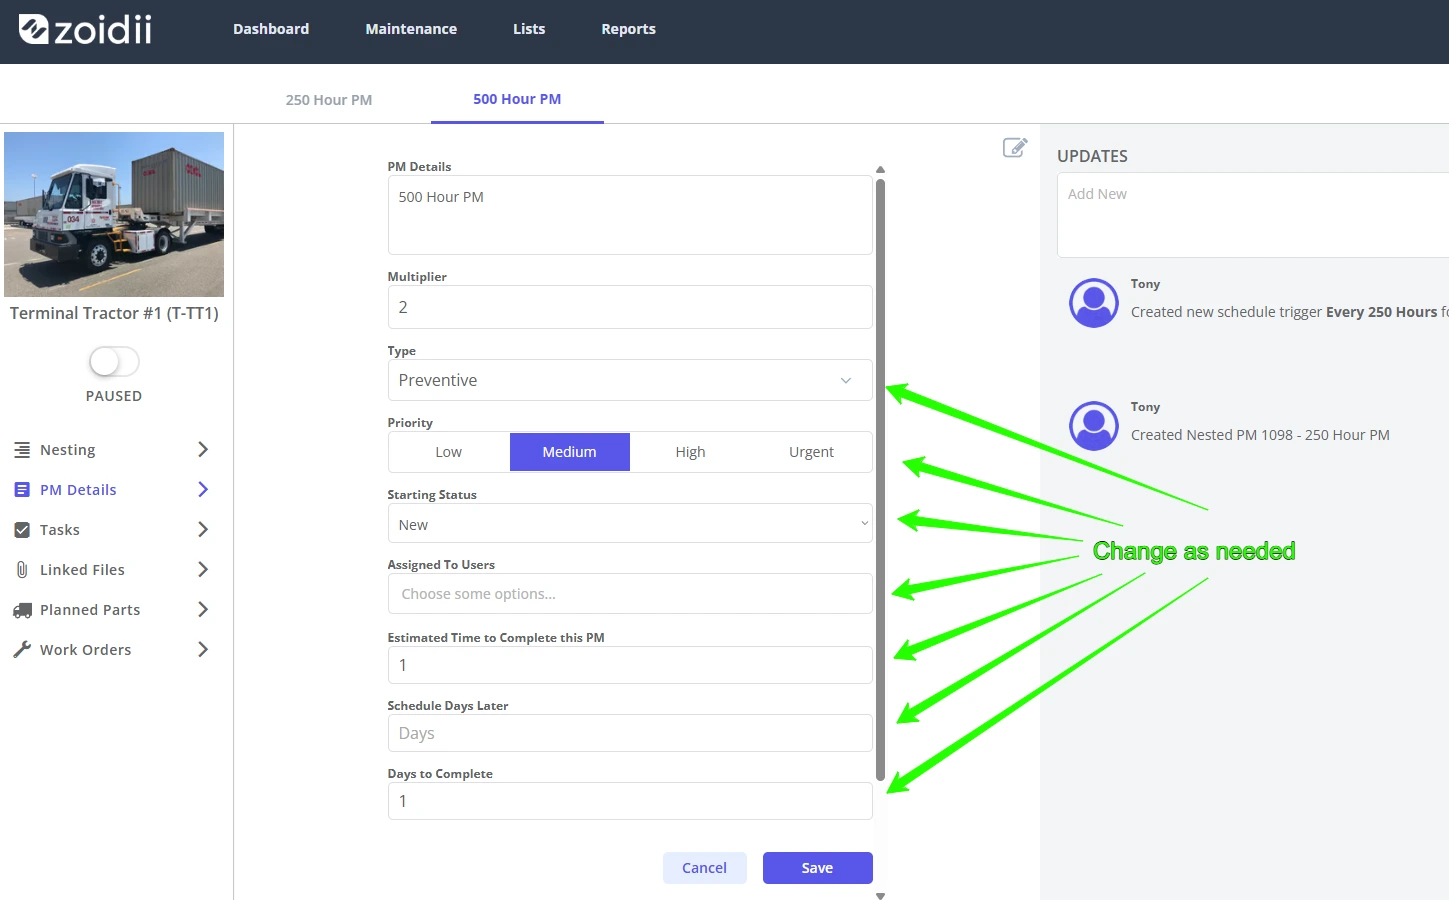
14. In the PM Details tab, make changes to the PM key fields if needed. You can change the priority, type, assigned users, estimated hours, and days to complete. In this example, when it's a 500hr PM, the priority has been raised to High, hours estimate increased to 3, days to complete set to 4:
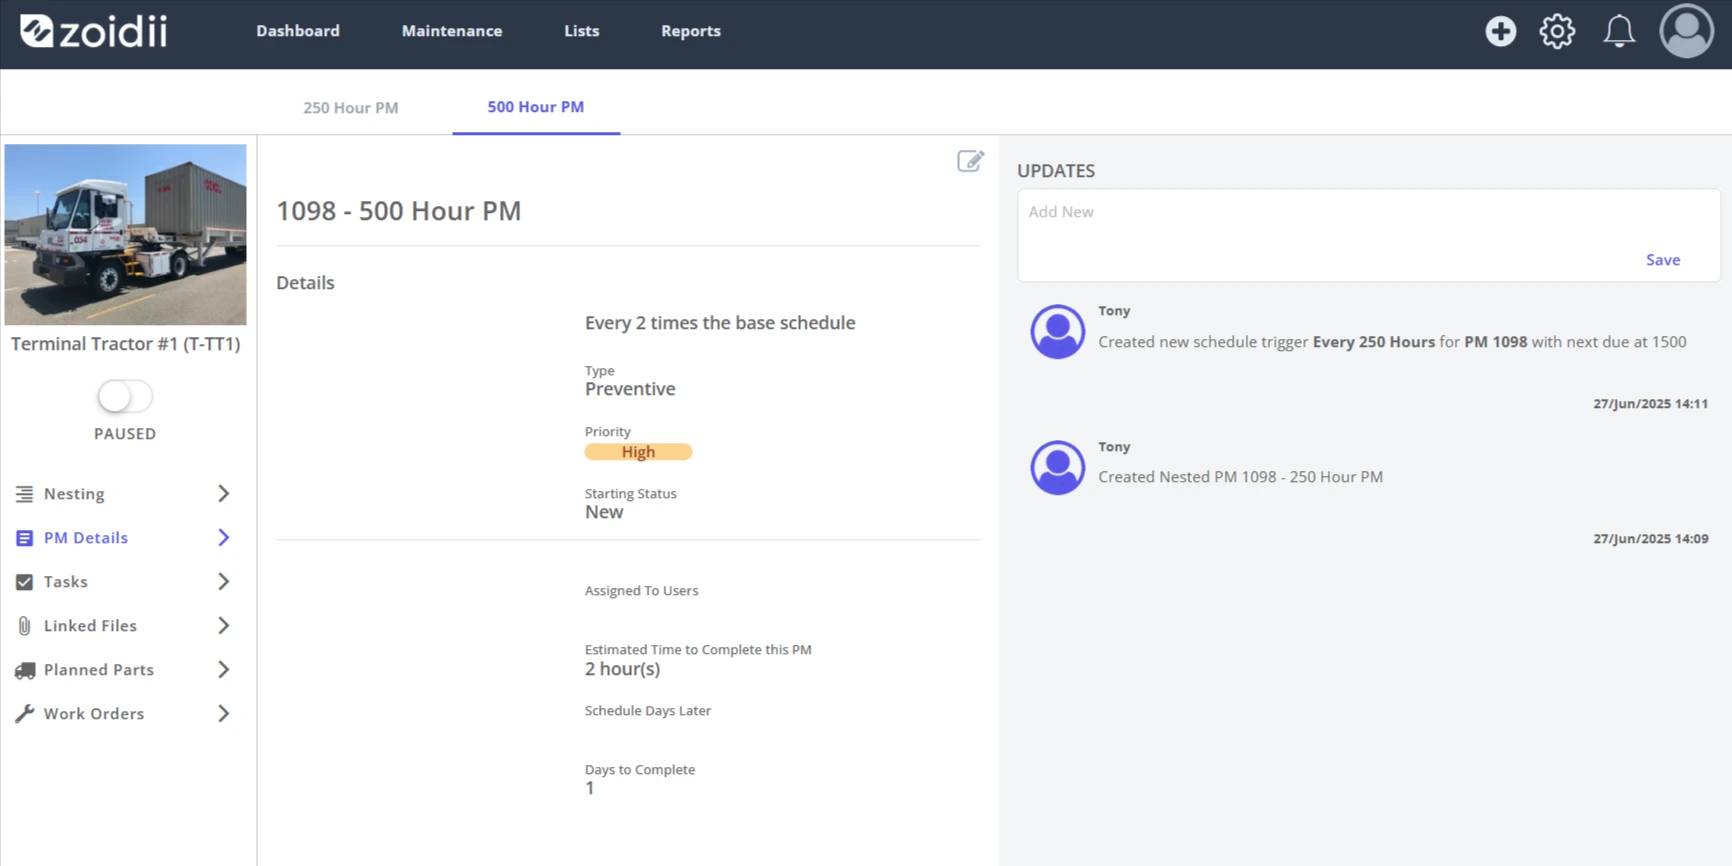
15. Click Save to lock in the changes for that nested interval.
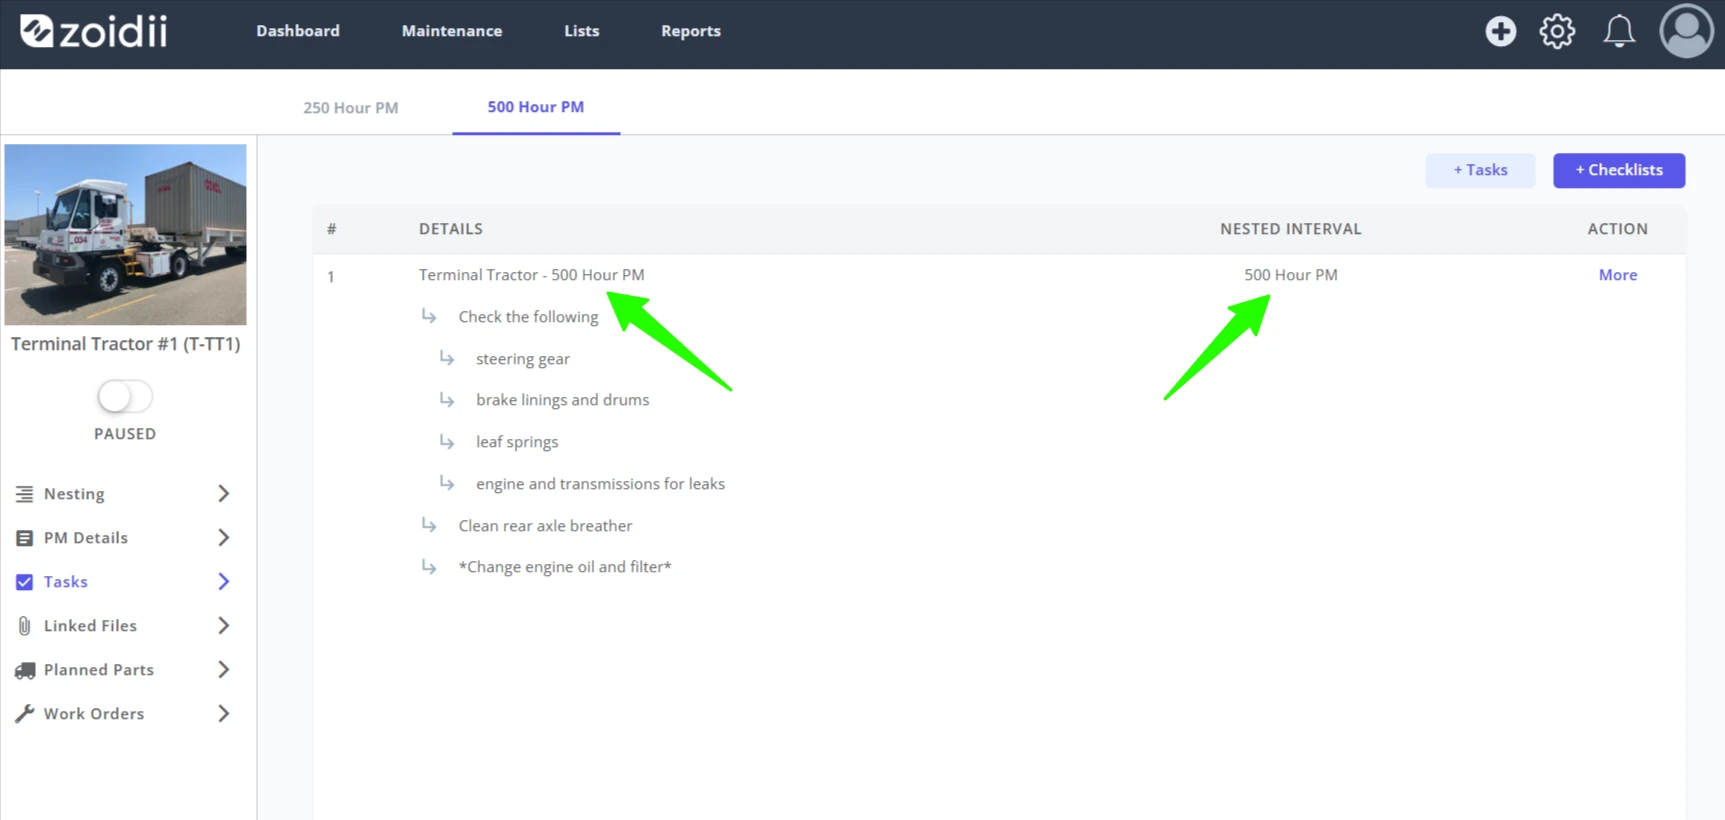
16. In the Tasks tab, repeat the process above and add the PM checklist for the 500hr PM
17. In the Parts tab, add the additional parts needed for the 500hr PM
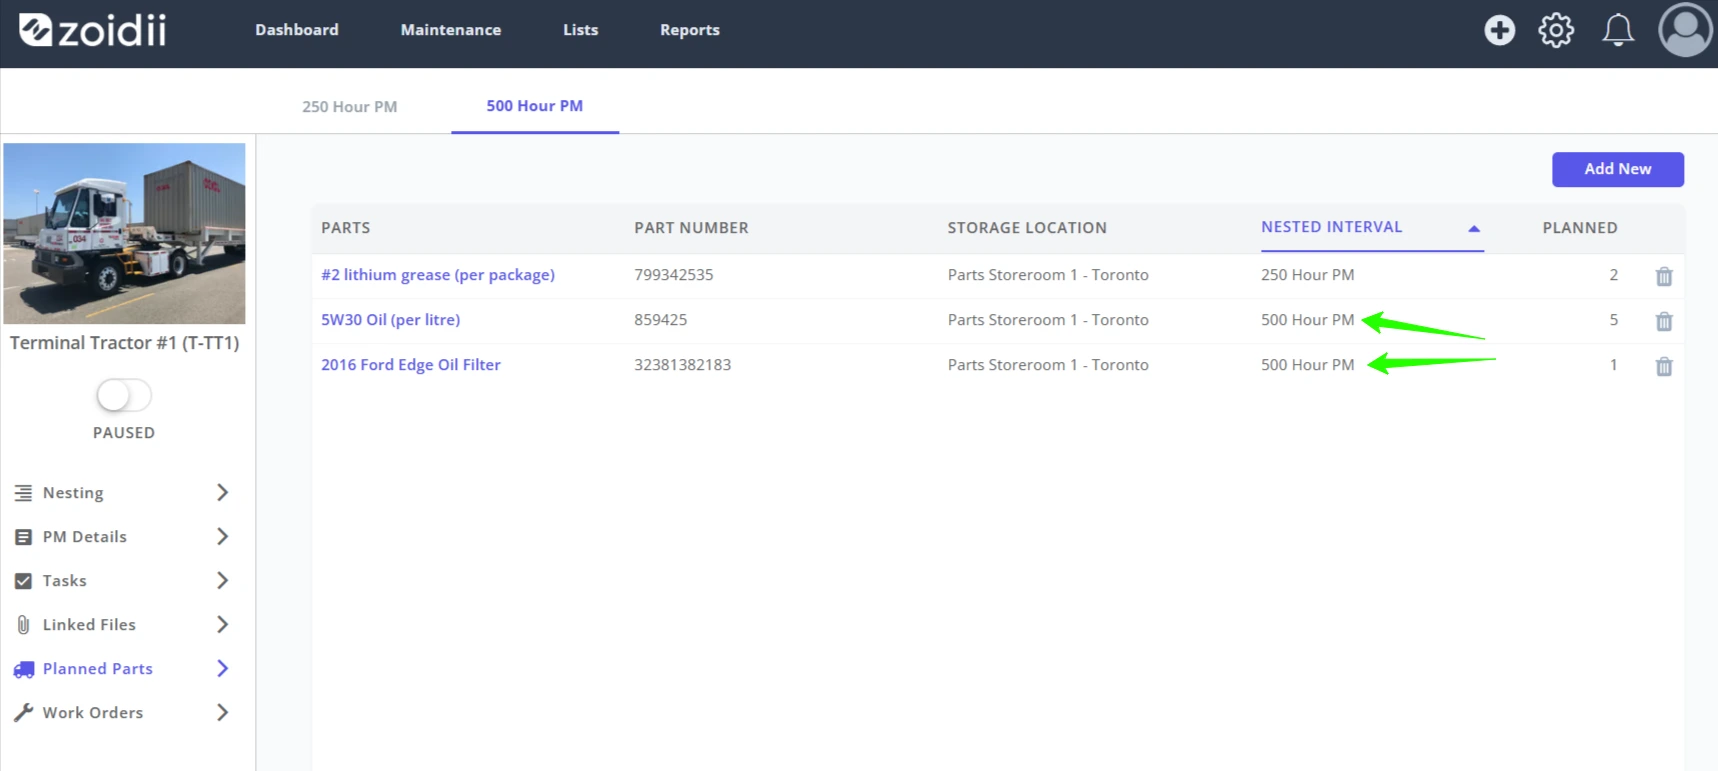
18. Repeats steps 12-18 for all nested intervals. In this example, we've also added the 1,000hr and 2,000hr PM intervals.
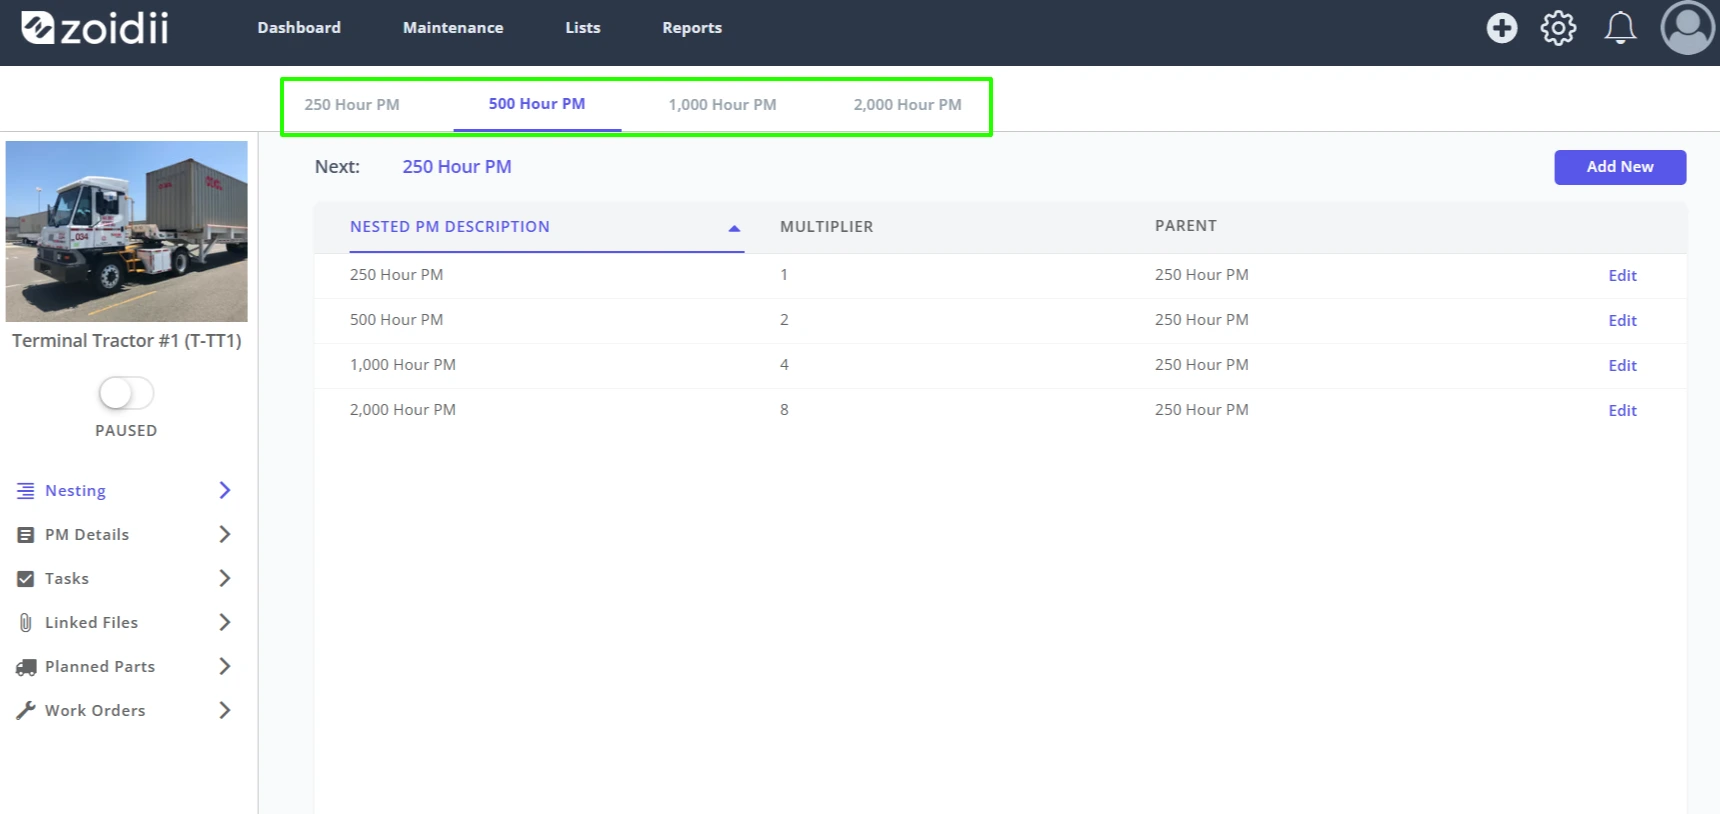
19. Next, configure the start point. As it stands, the nested PM cycle is starting from zero. Chances are your equipment is not brand new and has received some PMs. Click the Next PM Due
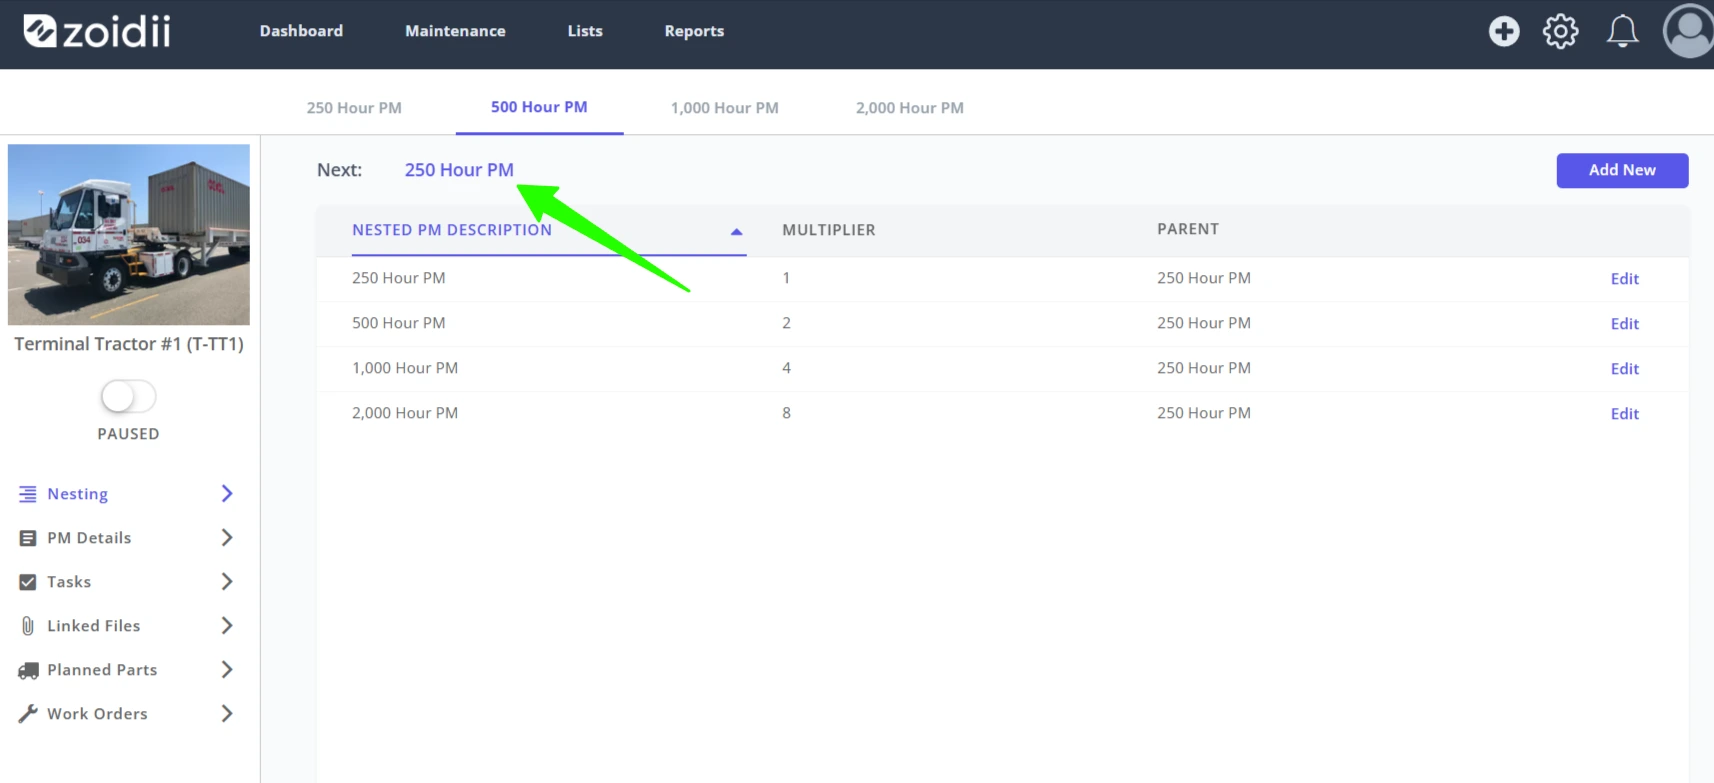
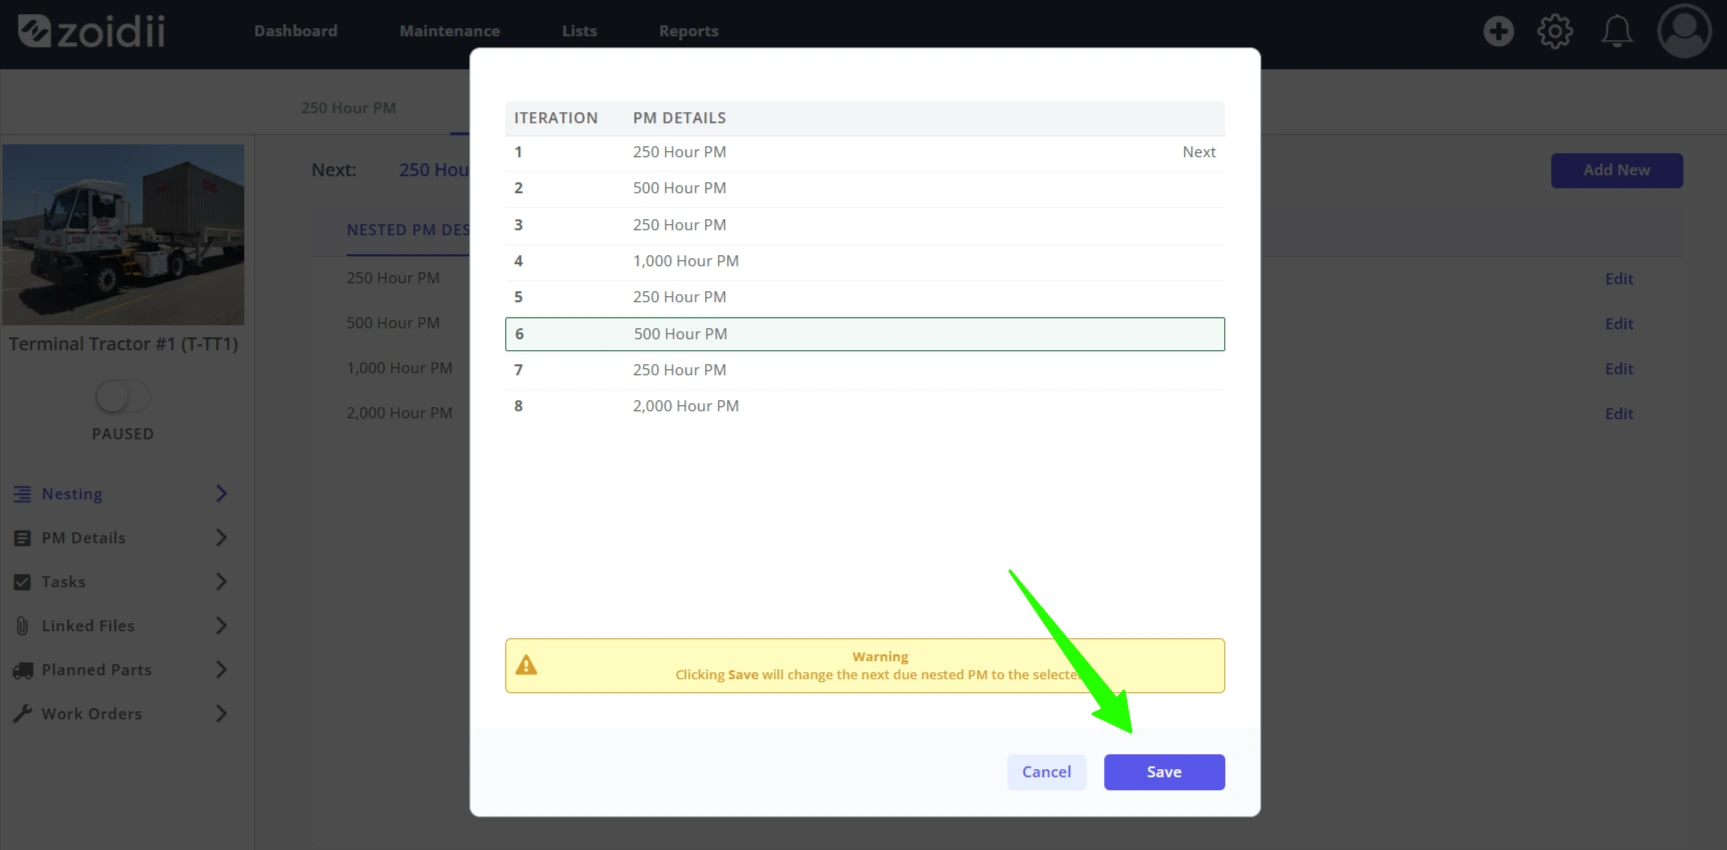
20. In this example, the next PM is the 500hr PM. However, we just did the 1000hr PM two iterations ago. So, we want to set the next PM to the 500hr PM in the 6th iteration position.
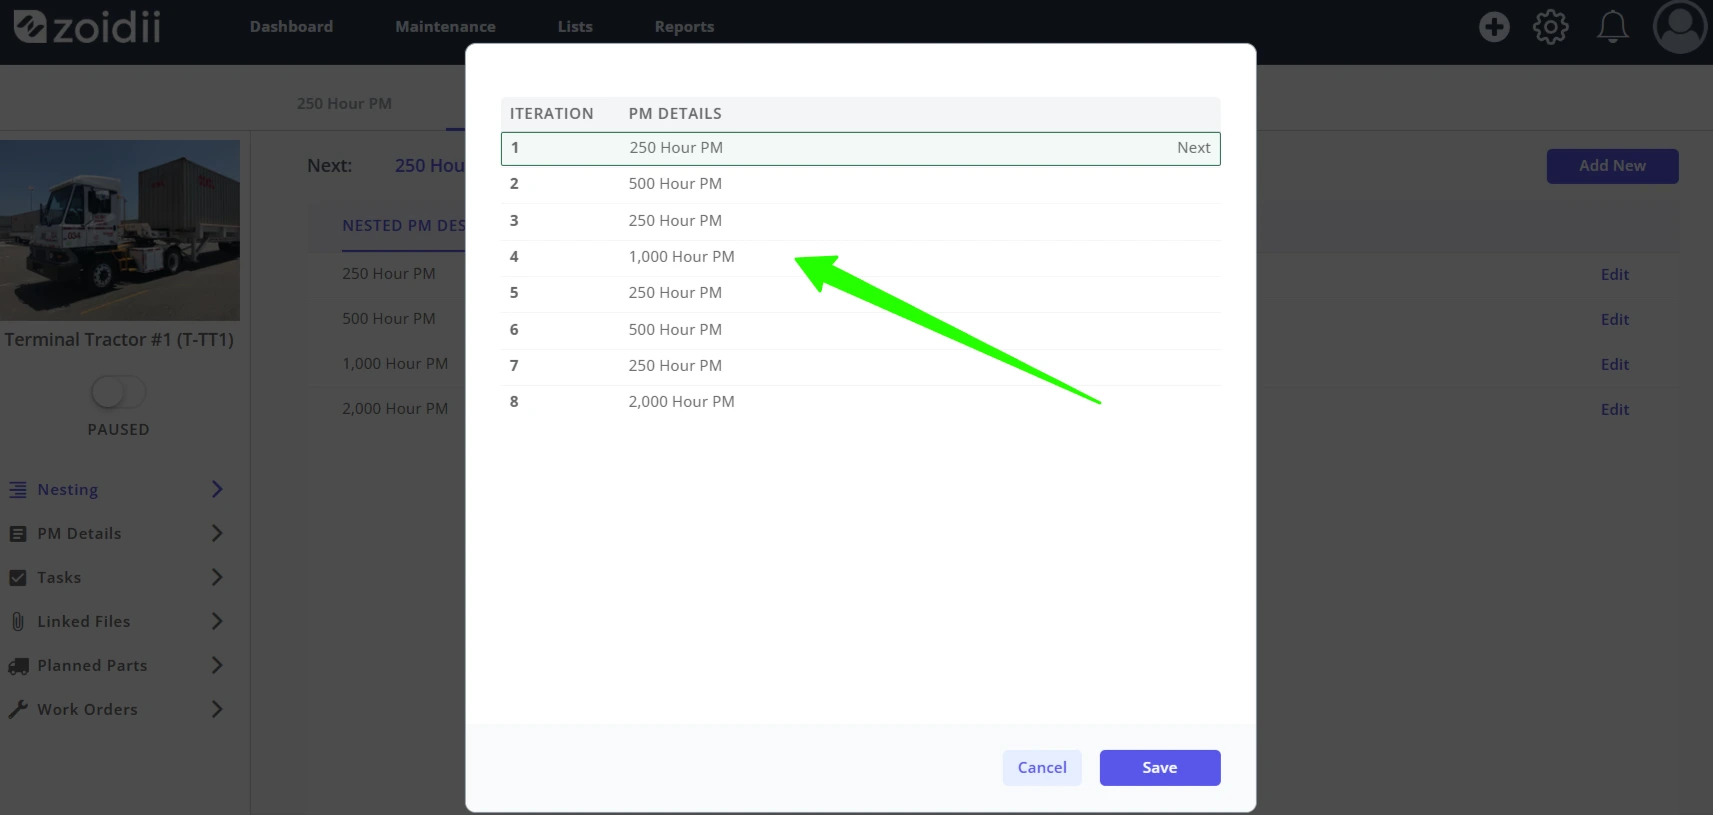
21. Select the next iteration, and click Save. When the PM next triggers, it will send the details for the 500hr PM to the PM work order.
22. Click the toggle to activate and set the PM schedule running
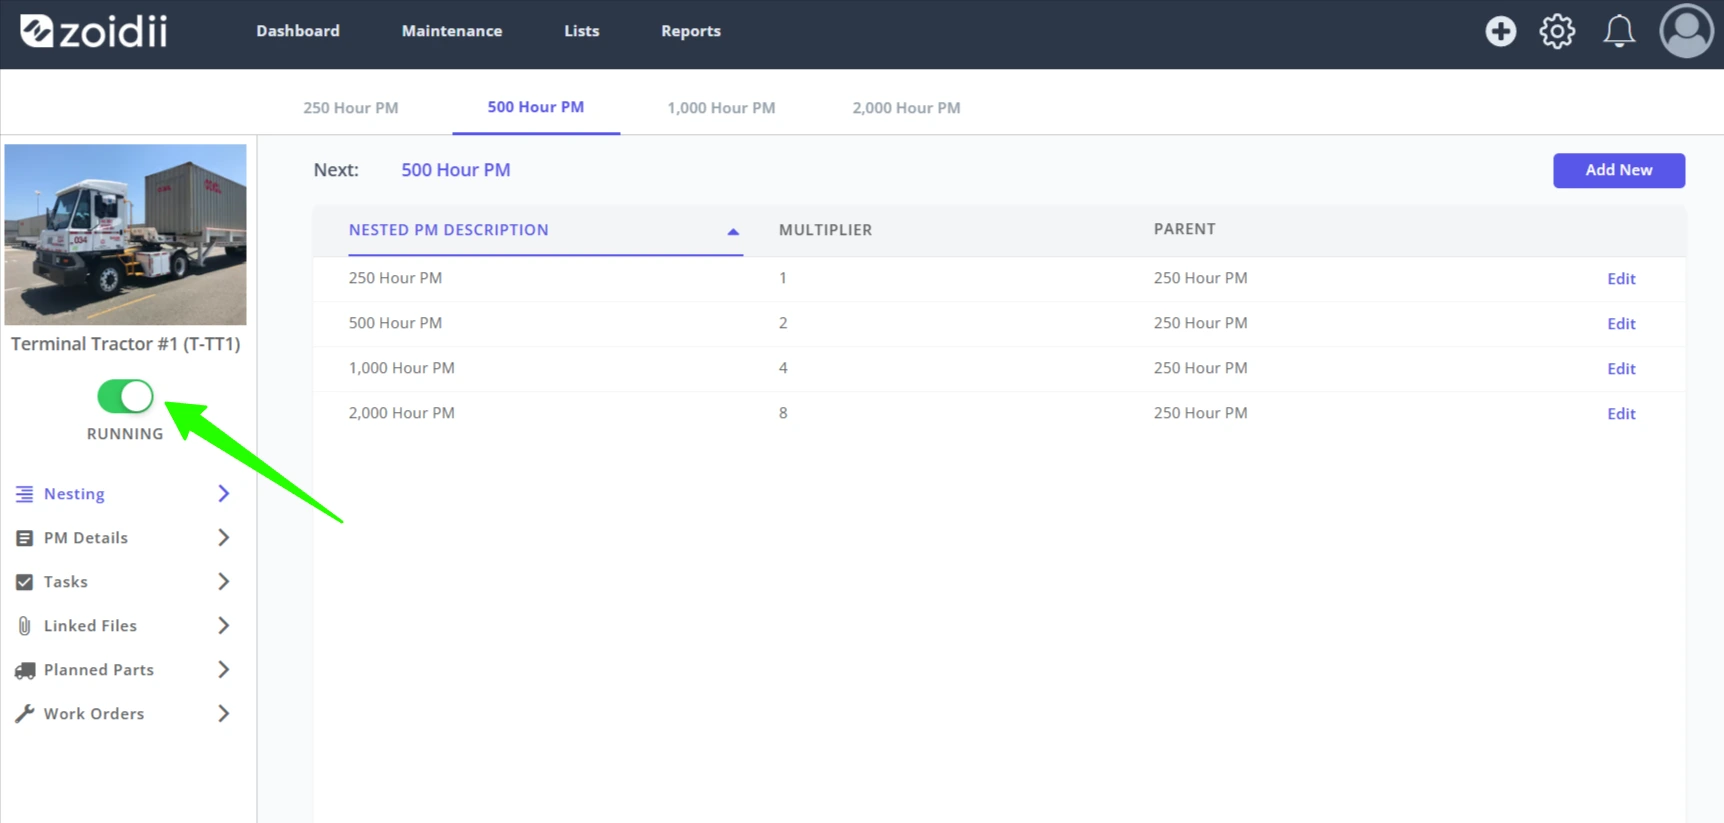
23. The next due iteration of this Nested PM shows up in the PM list screen: