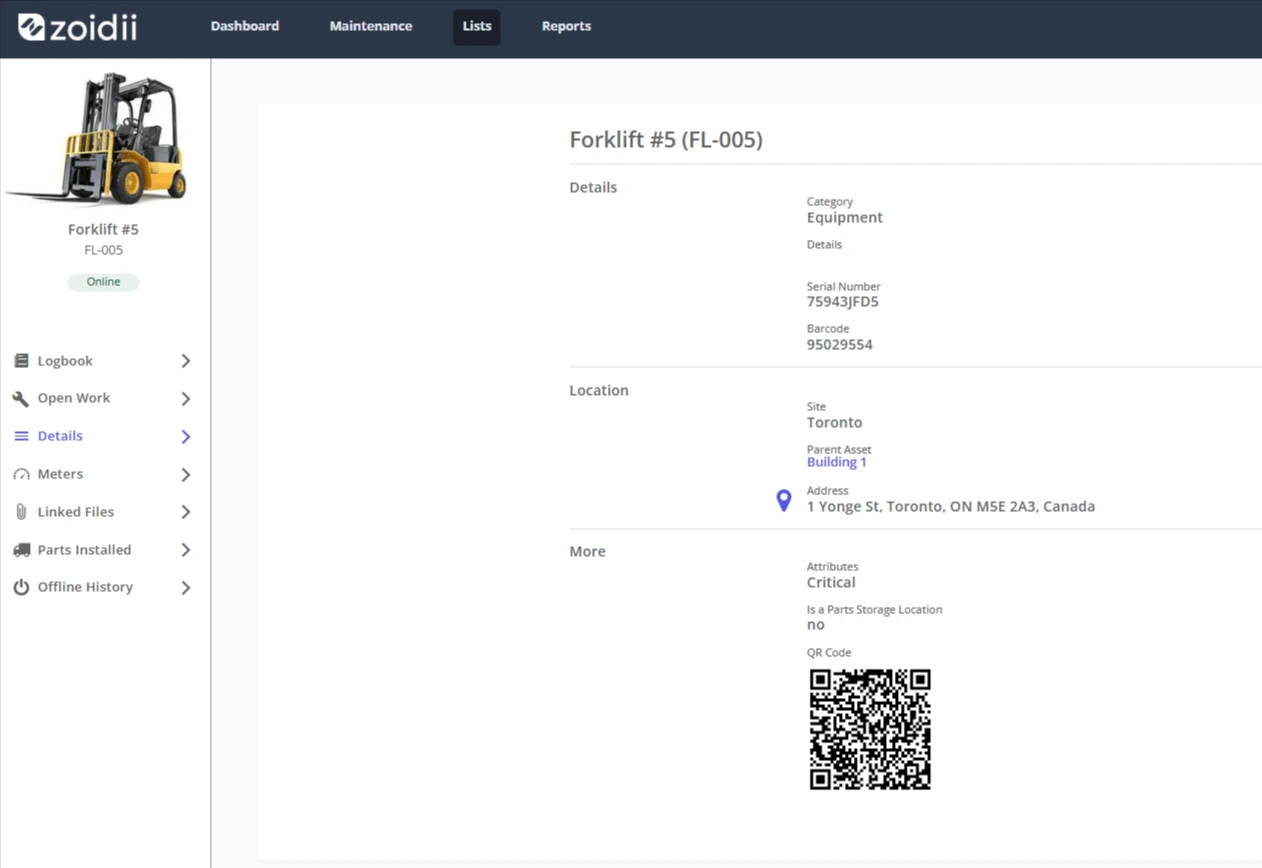

Background
An asset is any tangible item within the plant that has an operational, maintenance, safety, or financial value and needs to be identified, tracked, and managed. Physical assets typically include production equipment, utility systems, fixed plant infrastructure, and other maintainable items that support operations.Assets should be added to Zoidii when they are important to plant operation, require inspection or maintenance, have a replacement value, carry risk if they fail, or need to be included in maintenance history and reporting. In general, if an item needs to be maintained, monitored, or referenced in work orders, it should be created as an asset in Zoidii. Very small consumable items, loose tools, or items with no maintenance significance would normally not be added as assets unless the site has a specific business reason to track them.
Process
To ensure consistency and minimize rework, assets should be added in a top-down plant hierarchy. This means starting with the highest-level parent location or system and then building down into more specific areas and equipment. For example, the structure may begin with the site, then move to plant or building, then area, line or system, and finally the individual asset or equipment item. Creating assets in this order ensures each item sits in the correct location within the hierarchy, makes navigation easier, improves reporting, and supports clearer maintenance planning.Methods
Assets can be added to Zoidii in 5 ways:- Photo to Asset
- Manually using the web app (This procedure)
- Manually using the mobile app
- Cloning from an existing asset or asset hierarchy structure
- Data import. Please contact Zoidii support to execute in your CMMS.
Procedure
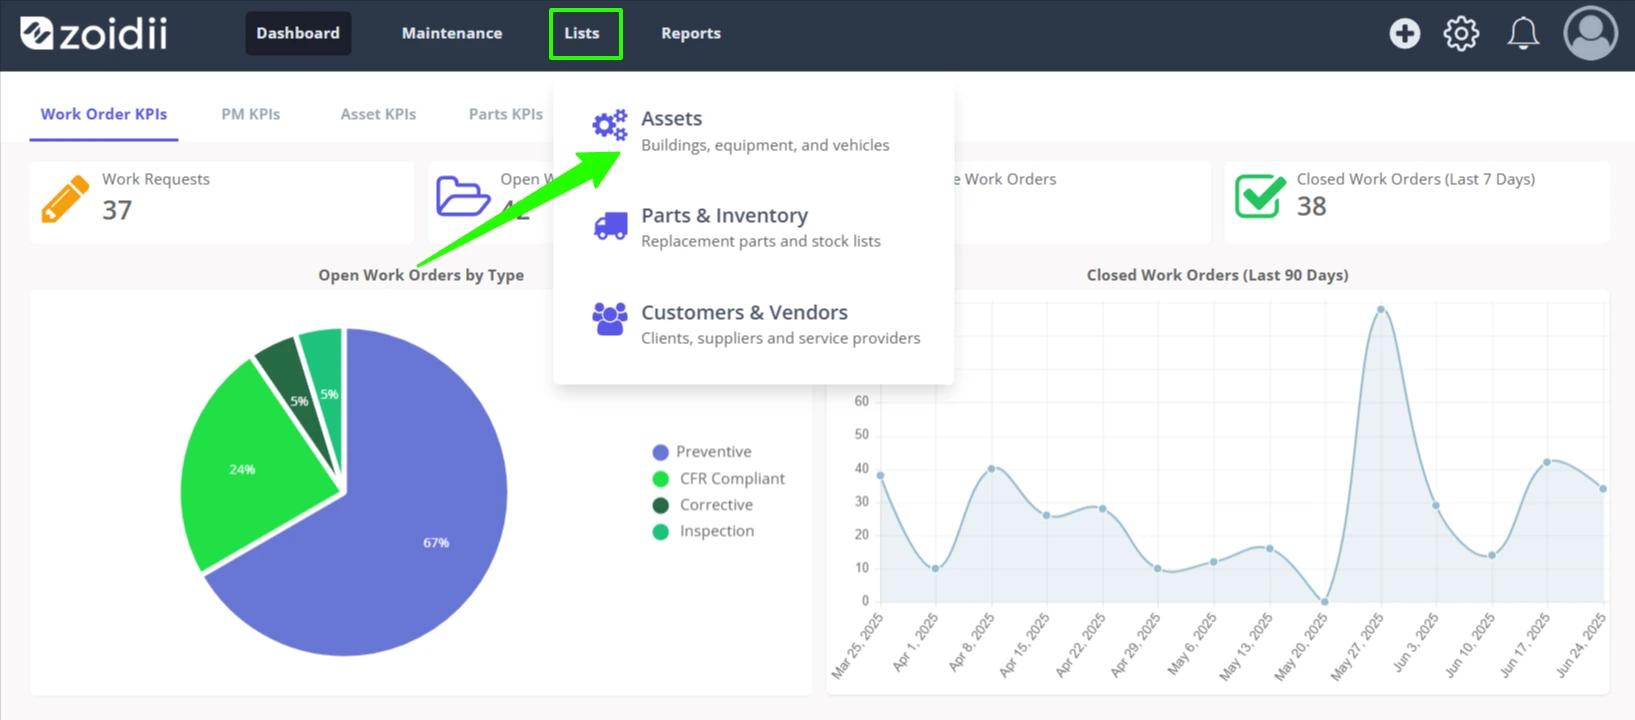
This procedure outlines the manual method to add assets via the desktop app1. In the top navigation bar, click Lists and select Assets from the dropdown menu
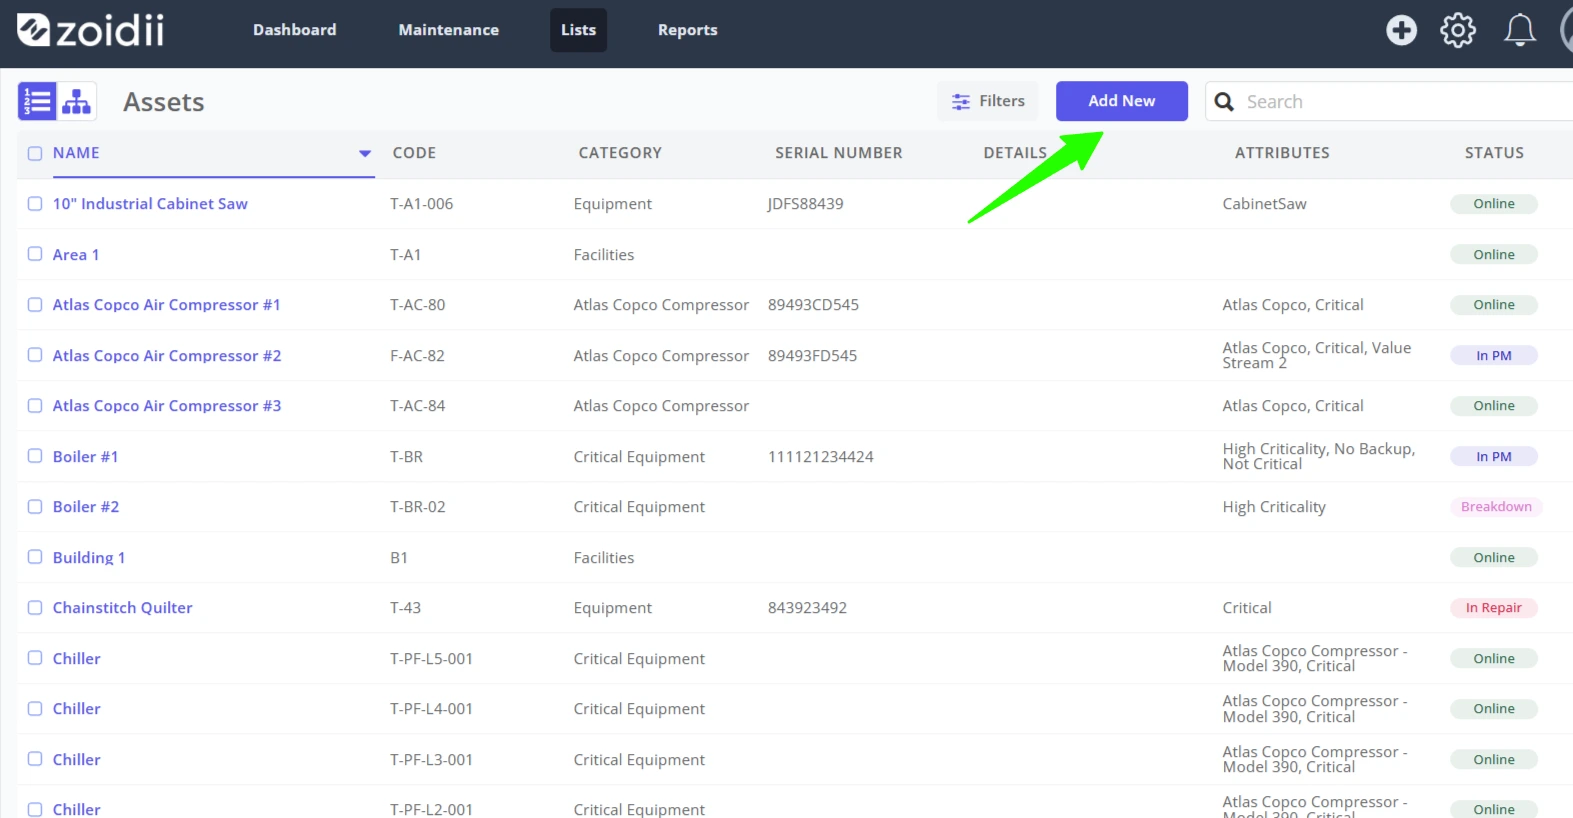
2. Click Add New
3. Add the asset Name and Code. When reading the code, users should know exactly what the asset is and where it is in the facility
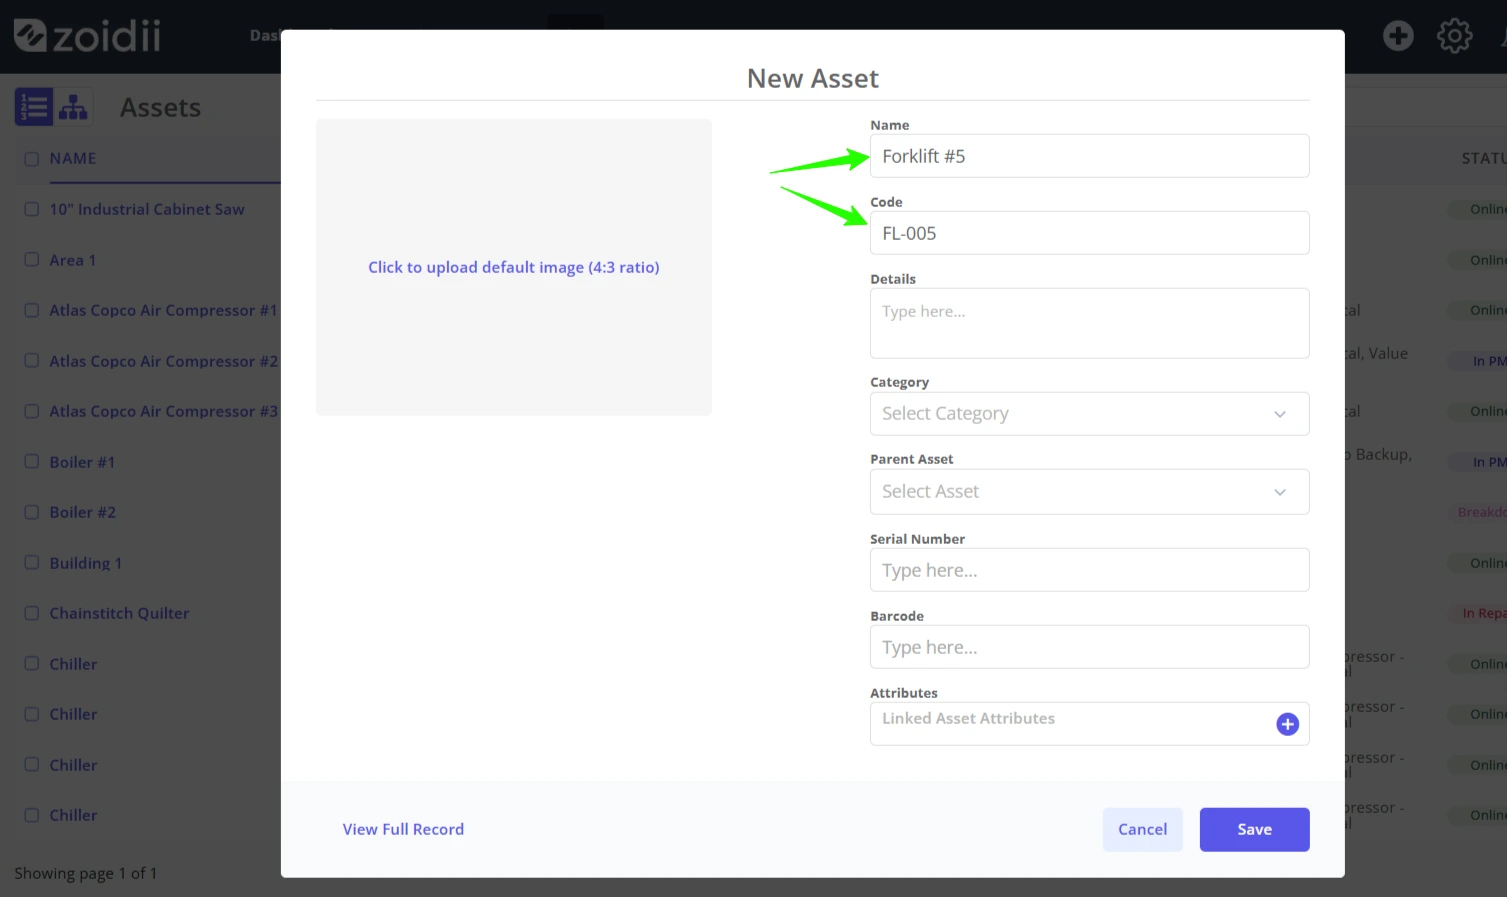
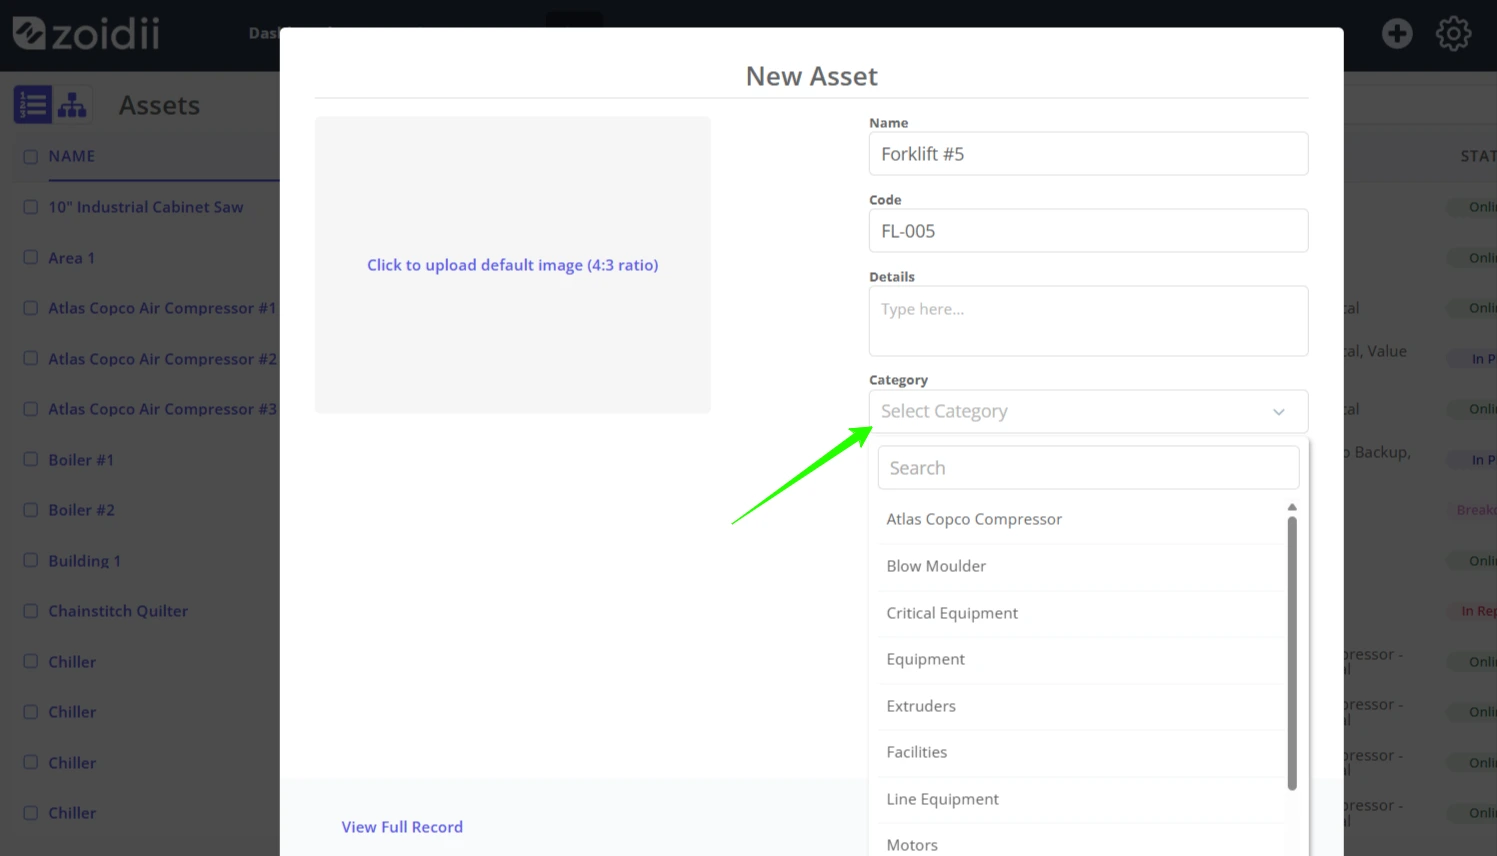
4. Assign the asset a category from the Asset Category dropdown. If a suitable category does not exist, create a new category as per the Add/Edit Asset Categories procedure
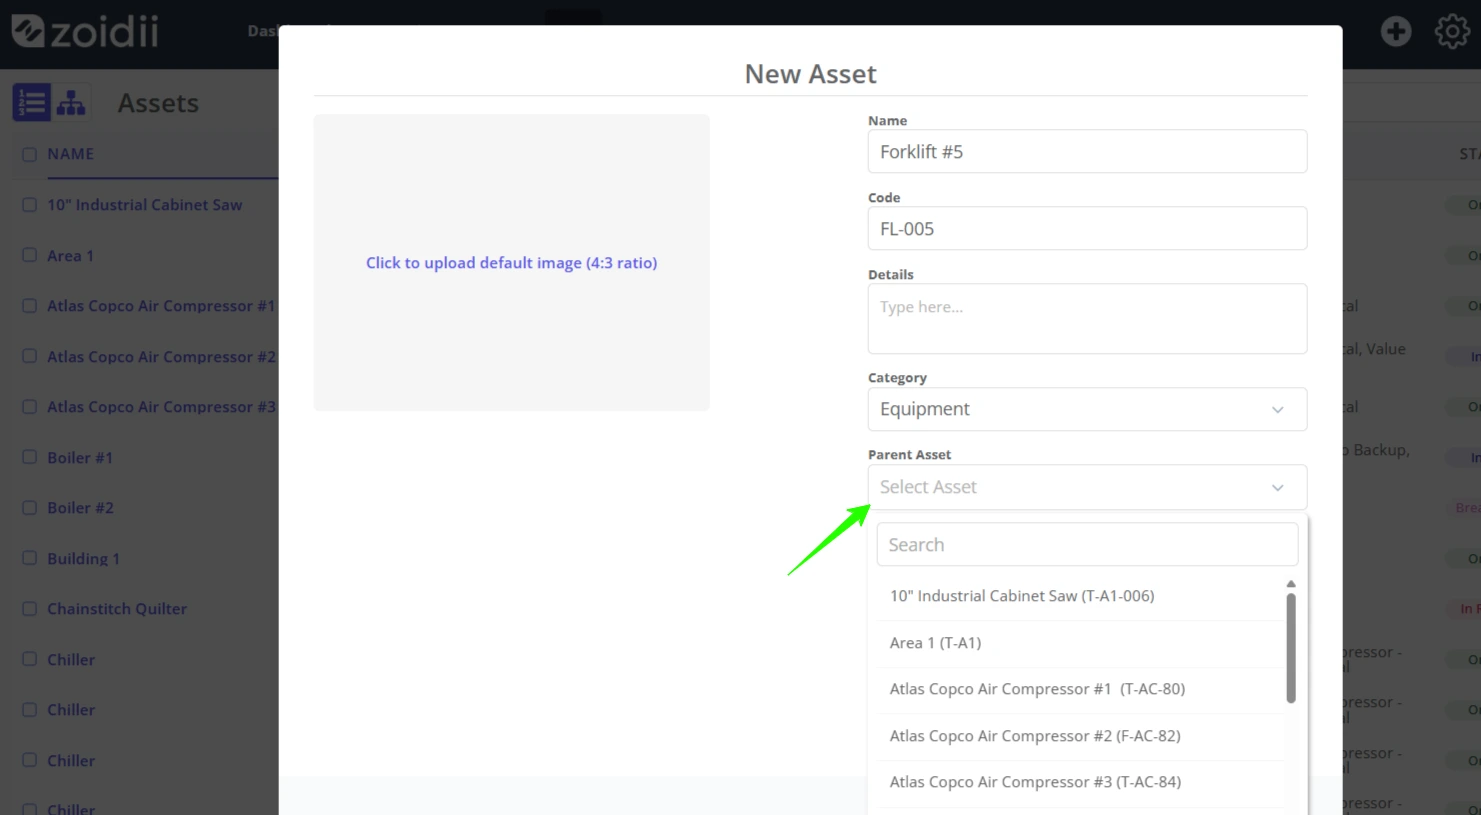
5. Assign the asset a parent location from the dropdown. The asset can either be in a location or part of another asset (engine in a car for example)
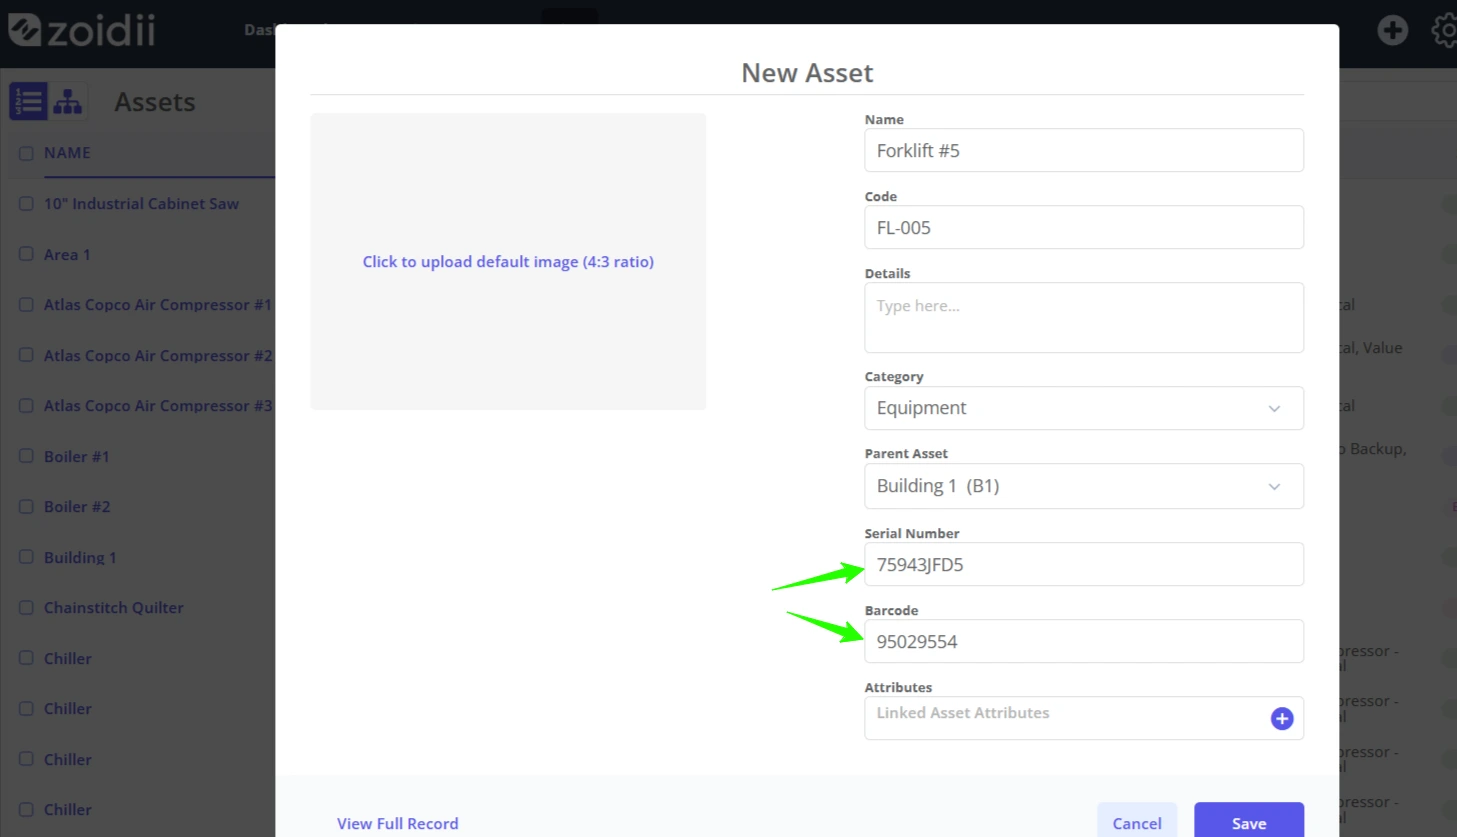
6. Add a Serial Number and Barcode for the asset if needed
Note:- The barcode cannot be scanned with the mobile app
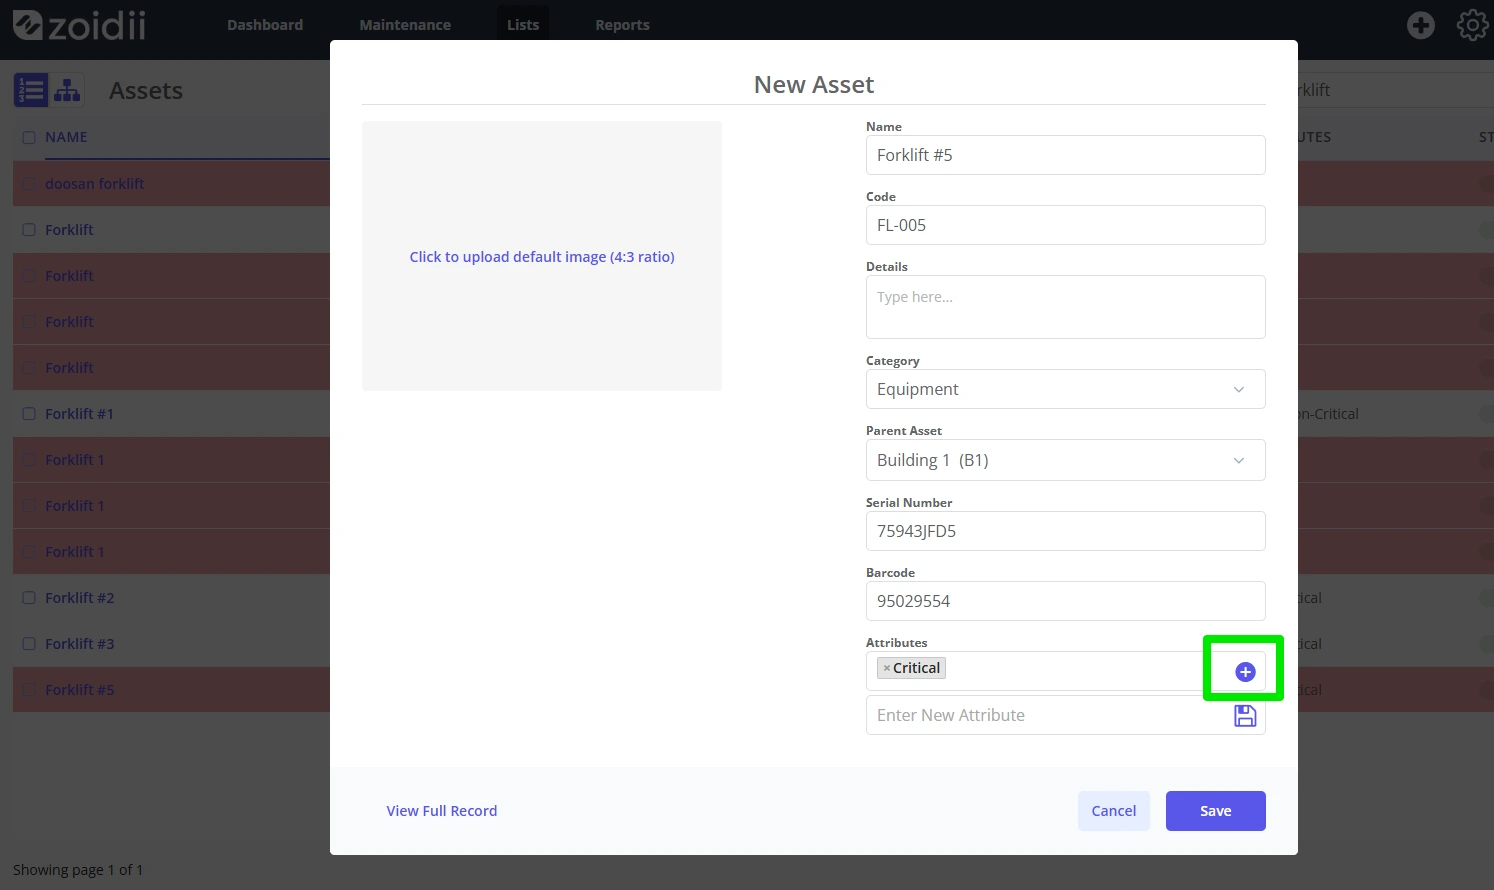
7. Assign the asset some Asset Attributes. Simply put, Asset Attributes are used to attach “labels” to your assets. For more information on asset attributes, see the Add/Edit Asset Attributes procedure
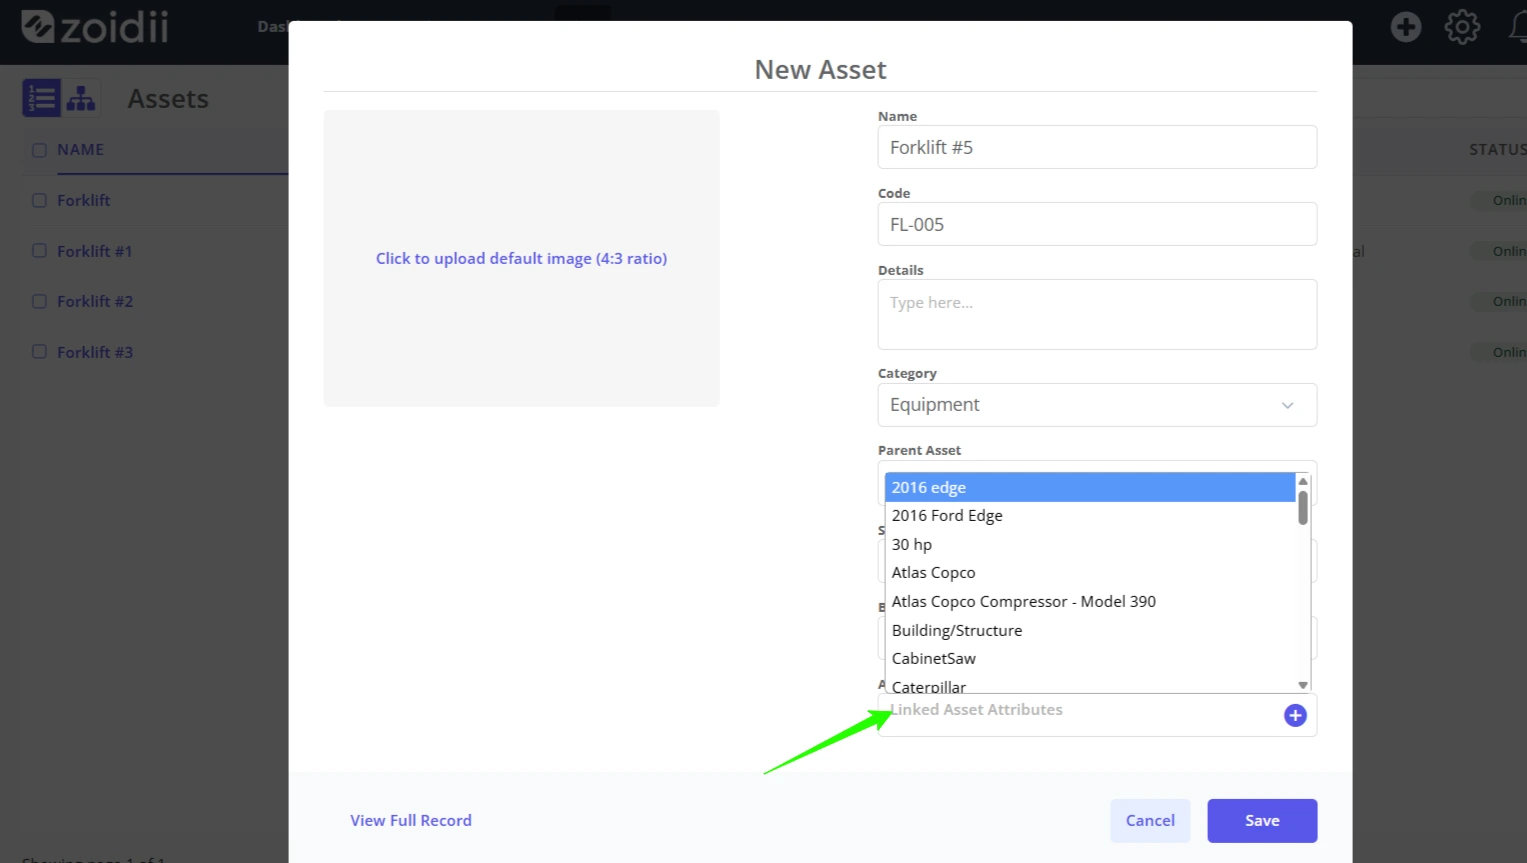
8. Asset attributes can be added on the fly by clicking the Add icon
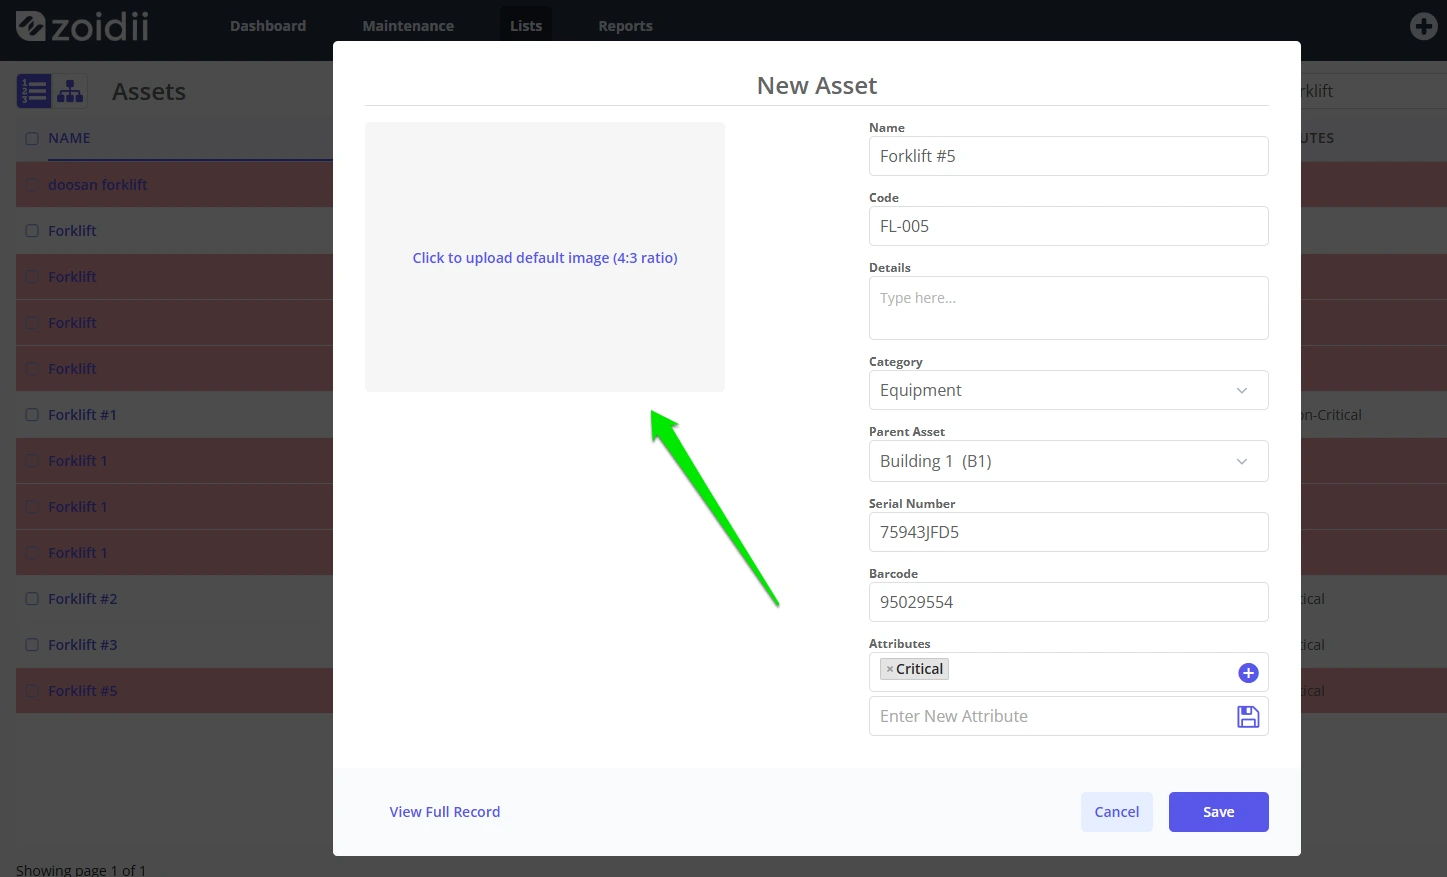
9. Click the image area to add a Default Image for the asset
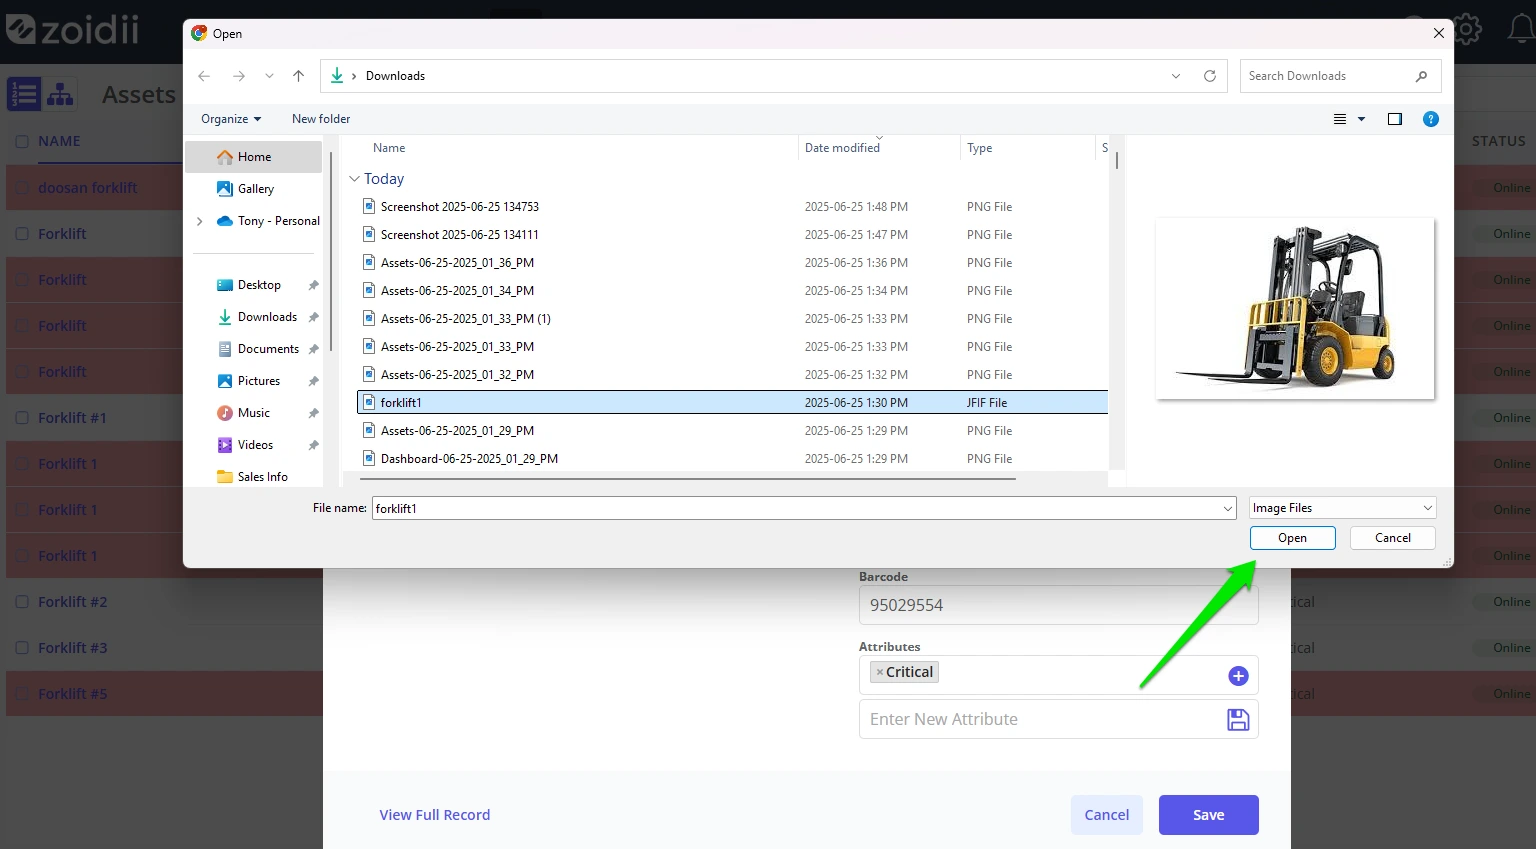
10. Find the image on the drive, and click Open
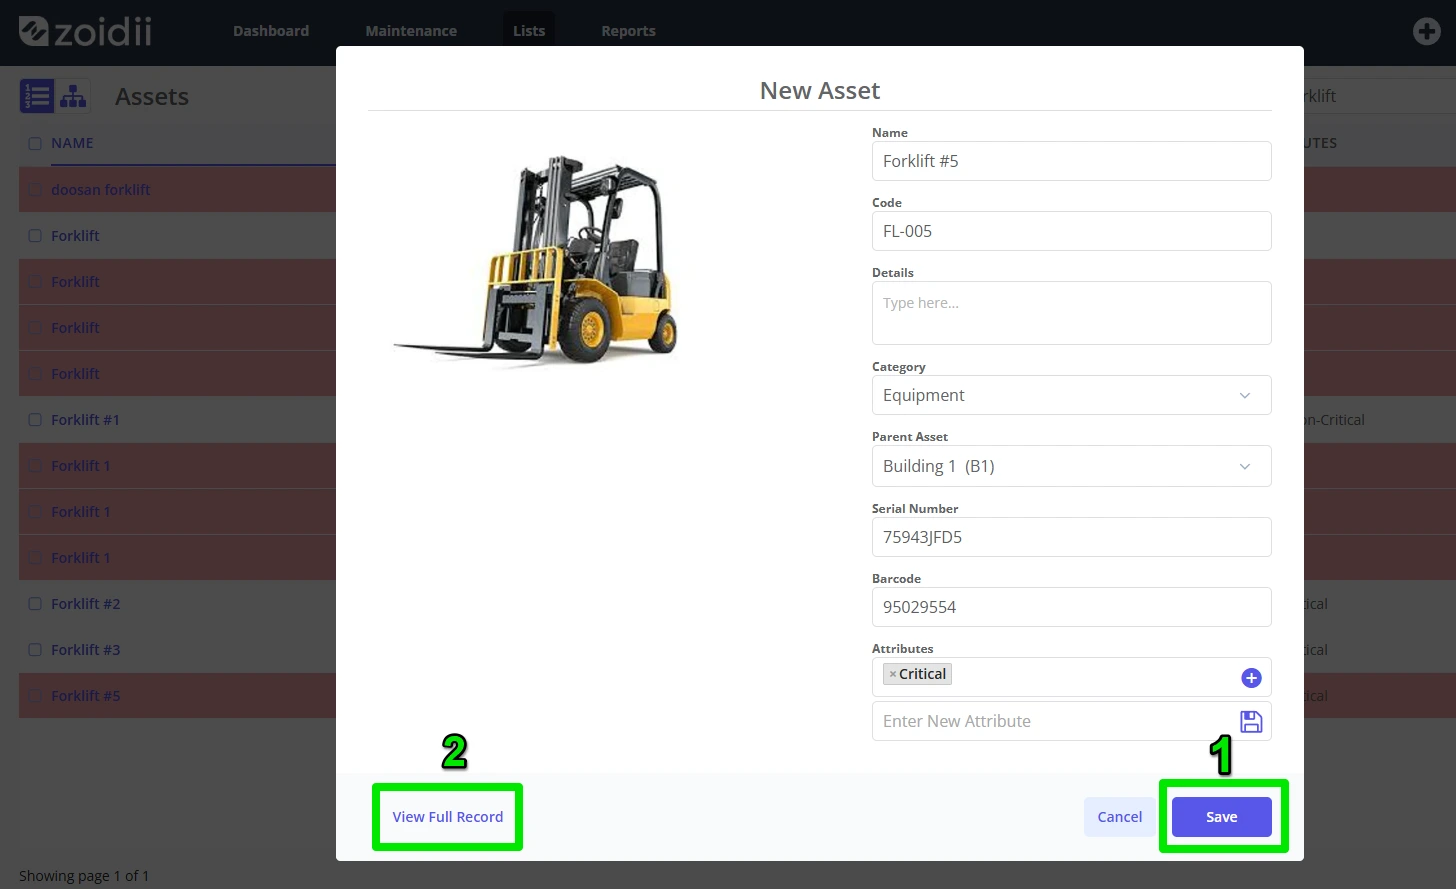
11. The default image is added to the asset record. The basic asset details are now added. Click Save to finalize and move onto the next asset, or click View Full Asset Record to add more details such as linked files, starting meter readings, asset description, any open work orders etc.
12. Full Asset Record: